The following game of alien encounters is true. And by true, I mean
false. It's all lies. But they're entertaining lies. And in the end,
isn't that the real truth?
The answer, is no.
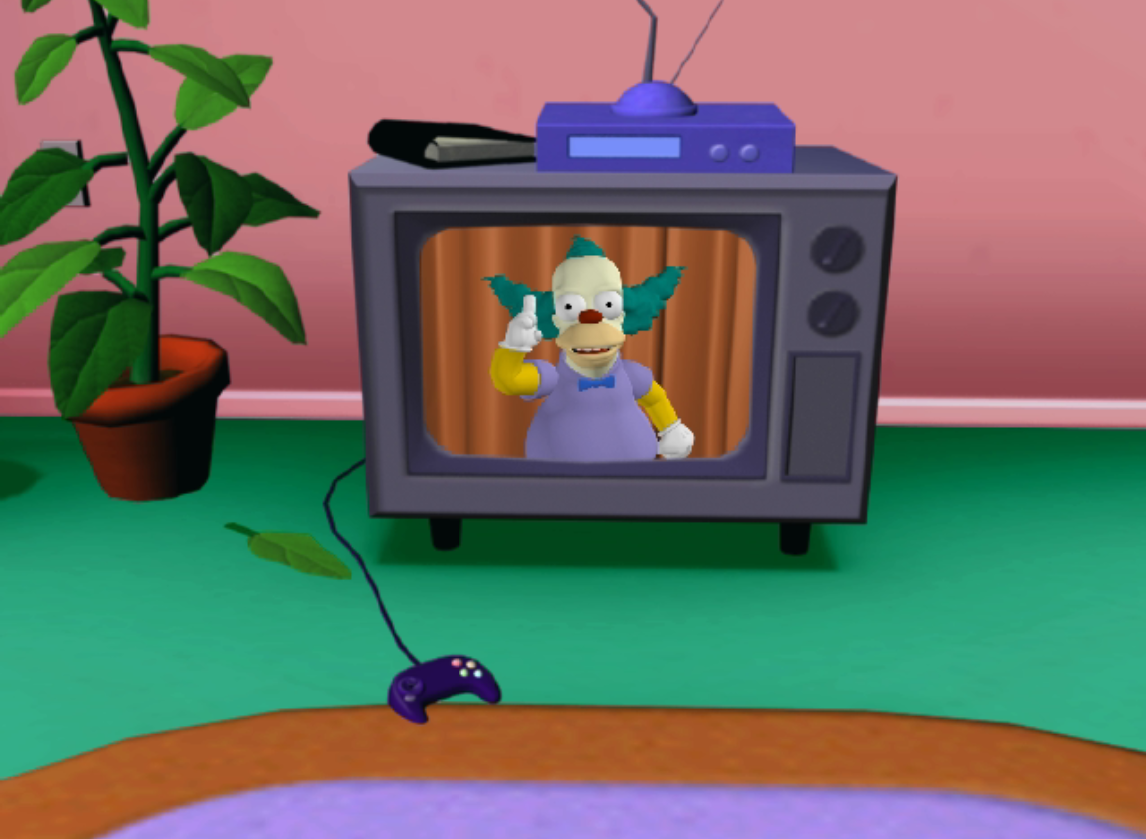
Our game begins on a sunny October morning, in a little town called
Springfield...
==============================================================================
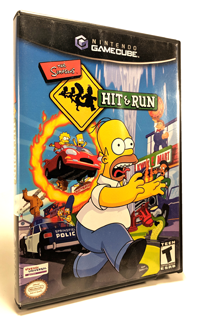
The FAQ/WALKTHROUGH for SIMPSONS HIT & RUN, v1.7
Based on the Nintendo Gamecube version
Written and updated by SubSane
Last updated July 11, 2004
==============================================================================
TABLE OF CONTENTS
-How to Find Stuff-
1. Find the section with the info you need.
2. Highlight the code number for the section.
3. Hold ctrl (Command for Macintosh) and press C.
4. Hold ctrl and press F to open a Find screen.
5. Hold ctrl and press V to paste, then search.
-GENERAL INFORMATION......................................1-
-The Black Vans and the Bees..........................1A
-The Cast.............................................1B
-THE BASICS...............................................2-
-Game Start...........................................2A
-Saving/Loading.......................................2B
-Status and Menu Screens..............................2C
-Controls and Techniques..............................2D
-Pick-ups.............................................2E
-The Wanted Meter.....................................2F
-MISSIONS WALKTHROUGH.....................................3-
-Level 1: From the Couch to Conspiracies..............3A
-Level 2: The Hunt for Bonestorm 2....................3B
-Level 3: Oh Bart, Where Art Thou?....................3C
-Level 4: An Evening With Marge.......................3D
-Level 5: The Apu Redemption..........................3E
-Level 6: Go Speed Laser, Go!.........................3F
-Level 7: Nightmare on Evergreen Terror...............3G
-STREET RACES.............................................4-
-Overview.............................................4A
-Racing Strategies....................................4B
-Race Locations.......................................4C
-COLLECTOR CARDS..........................................5-
-WASP CAMERAS.............................................6-
-GAGS.....................................................7-
-OTHER STUFF..............................................8-
-Character Vehicles...................................8A
-Other Vehicles.......................................8B
-Character Clothing...................................8C
-Bonus Game...........................................8D
-Coin Collecting......................................8E
-CODES AND SECRETS........................................9-
-GUIDE INFORMATION........................................10-
-Version History......................................10A
-Guide Credits........................................10B
-Contact Information..................................10C
-Legal Stuff..........................................10D
==============================================================================
===== 1- GENERAL INFORMATION =================================================
------------------------------------------------------------------------------
1A. The Black Vans and the Bees
------------------------------------------------------------------------------
The citizens of Springfield are growing suspicious over the sudden appearance
of mysterious black vans and wasp-shaped video cameras throughout the town.
They are appearing in every corner and it seems no citizen is safe from their
peeping-tommery.
Where did they come from?
Who is behind it all?
And what's all the "buzz" about NEW and IMPROVED Buzz Cola?
------------------------------------------------------------------------------
1B. The Cast
------------------------------------------------------------------------------
- - - - - - - - -
Homer Jay Simpson
- - - - - - - - - - - - - - - - - - - - - - - - - - - - - -
Homer Simpson isn't smart, or intelligent, or even somewhat bright, but when
black vans and wasp cameras start appearing, he notices. I mean come on, they
interrupt TV time!
Well, now Homer has to assist in the investigation of the strange happenings
in Springfield. NO ONE messes with TV...
- - - - - - -
Bart Simpson
- - - - - - - - - - - - - - - - - - - - - - - - - - - - - -
Bart's always out to have a little fun, after all he is "America's bad boy".
But this time he's stumbled onto a mystery worse than his vandalism.
Bart may not want to, but he is now involved in the most dangerous conspiracy
in Springfield history.
- - - - - - -
Lisa Simpson
- - - - - - - - - - - - - - - - - - - - - - - - - - - - - -
Why, oh why does Lisa always get dragged into these situations? Bart is in
trouble, and as always it's Lisa's job to get him out of it.
But the more she searches, the eerier the mystery becomes.
- - - - - - -
Marge Simpson
- - - - - - - - - - - - - - - - - - - - - - - - - - - - - -
Marge is the American mom. If her husband is well fed and her kids are happy,
then she's a happy home maker. But when anyone messes with her baby boy, get
out of the way!
Her quest to protect the children of Springfield will unveil more of the evil
conspiracy.
- - - - - - - - - - - -
Apu Nahasapeemapetilon
- - - - - - - - - - - - - - - - - - - - - - - - - - - - - -
Apu doesn't care what happens in the outside world because the Kwik-E-Mart is
his home away from home. Black vans and wasp cameras? Where?
But now that his credibility as a merchant went from bad to really bad, it's
payback time! He's also going to help in the investigation.
==============================================================================
===== 2- THE BASICS ==========================================================
------------------------------------------------------------------------------
2A. Game Start
------------------------------------------------------------------------------
- - - - -
New Game
- - - - - - - - - - - - - - - - - - - - - - - - - - - - - -
Choose this to start a new game.
- - - - - -
Resume Game
- - - - - - - - - - - - - - - - - - - - - - - - - - - - - -
Start from the game that was last loaded.
- - - - -
Load Game
- - - - - - - - - - - - - - - - - - - - - - - - - - - - - -
Load a saved game from the memory card.
- - - - -
Scrapbook
- - - - - - - - - - - - - - - - - - - - - - - - - - - - - -
This keeps track of all the statistics for each level, as well as the
statistics for the game as a whole. You can track your progress here.
- - - -
Options
- - - - - - - - - - - - - - - - - - - - - - - - - - - - - -
Controller: Select from the different control configurations for both
on-foot and vehicle playing.
Sound: Adjust the Music, Effects, Vehicle noise, and Voices.
View Movies: Watch all the cutscenes that have been unlocked so far.
View Credits: Watch the credits for the game.
- - -
Bonus
- - - - - - - - - - - - - - - - - - - - - - - - - - - - - -
This is a bonus game that can be unlocked when the collector cards in any
level are all collected. It's a little racing game that can be from 1 to 4
players.
------------------------------------------------------------------------------
2B. Saving/Loading
------------------------------------------------------------------------------
- - - -
Saving
- - - - - - - - - - - - - - - - - - - - - - - - - - - - - -
You can press Start at any time in the game and select Save to save your
current progress to a memory card. The game will also ask you to save after
every level.
- - - -
Loading
- - - - - - - - - - - - - - - - - - - - - - - - - - - - - -
Select the Load Game icon at the living room menu, then choose your saved
game.
------------------------------------------------------------------------------
2C. Status and Menu Screens
------------------------------------------------------------------------------
- - - - - - - - - - -
Normal Status Screen
- - - - - - - - - - - - - - - - - - - - - - - - - - - - - -
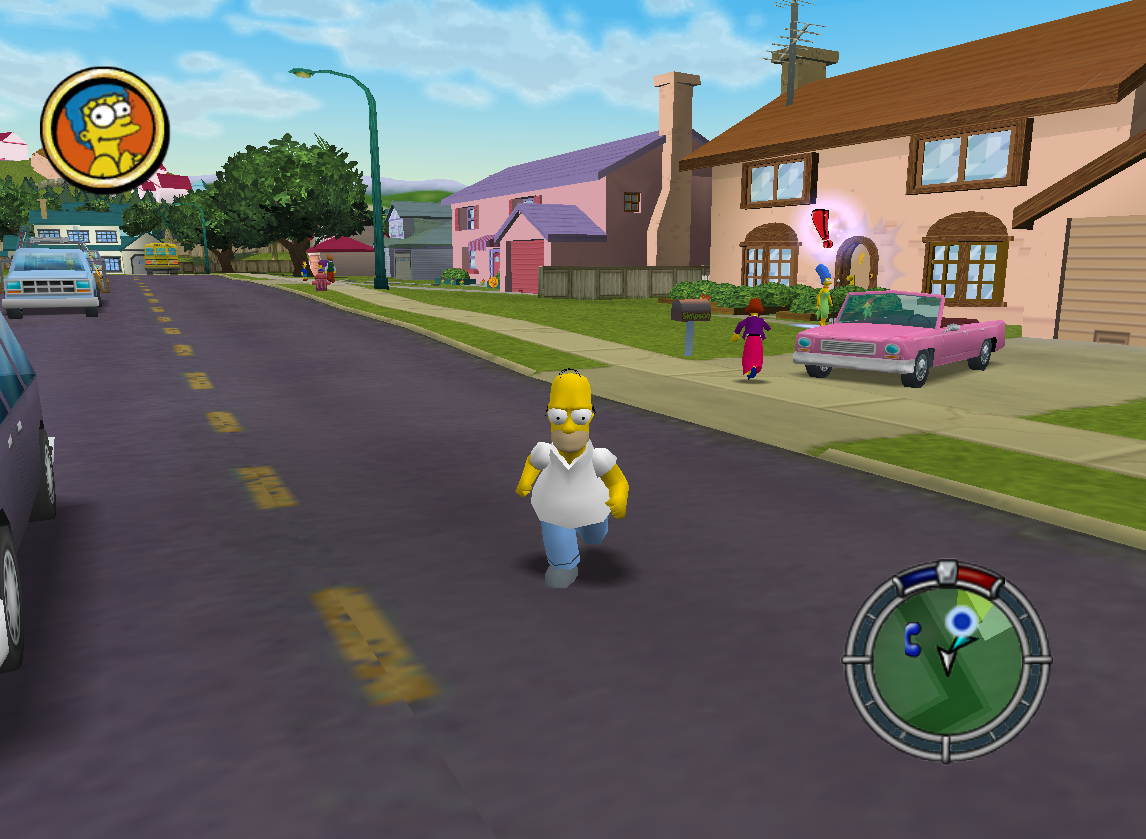
Next Mission: In the top-left corner there will be a picture of either a
character or a location. This shows who you have to talk to or where you have
to go to start the next mission.
Map/Radar: The green area of that circle in the bottom corner is your map.
Pay attention to it when you want to see where the mission objective is. The
white buildings on the radar represent buildings you can enter.
There are also a few icons that will appear. Telephones show where the vehicle
telephones are, black and white flags show where the street races are located,
and a pair of red dice shows where Louie is located (for the wager race).
Hit & Run Meter: The outside part of the circle is the Hit & Run meter, which
I will refer to as the H&R meter. Every time you hit an object, person, or
vehicle it begins to fill up. When the meter reaches the blue side you have
a Hit & Run.
The cops will begin chasing you and will fine you 50 coins if you get cornered
or stopped. The best way to avoid them is to find a straight road and run for
it.
Coins: Pick up a coin and your total will be shown for a brief time in the
top-right corner.
- - - - - - - - - - -
Mission Status Screen
- - - - - - - - - - - - - - - - - - - - - - - - - - - - - -
During a mission you will have the same things on the screen with a few
additions.
Time: Many of the missions will be timed, and the remaining time will be
shown in the upper-left corner next to the mission objective.
Race position: If you are in a race, your position will be shown in the upper
left corner.
- - - - - - - - -
Normal Pause Menu
- - - - - - - - - - - - - - - - - - - - - - - - - - - - - -
Continue: Continue playing.
Mission Select: This option allows you to choose ANY mission that you have
already played. Use Left and Right to scroll through any of the seven levels,
and Up and Down to select the mission.
Level Progress: Check the statistics for what you have accomplished in each
level.
View Cards: View the collector cards you have collected so far.
Options: Adjust the Sound or Settings.
Save Game: Save your game to a memory card.
Quit Game: Quit the game and return to the living room menu.
Next Mission: In a box in the bottom corner you can check where to go to get
your next mission.
Coins: You can always see the number of coins you have by pressing Start and
looking in the top corner.
- - - - - - - - - -
Mission Pause Menu
- - - - - - - - - - - - - - - - - - - - - - - - - - - - - -
Continue: Continue playing.
Restart Mission: You can choose to restart the mission from the beginning.
Cancel Mission: Cancel the mission any time by selecting this option.
Options: Adjust the Sound or Settings.
Quit Game: Quit the game and return to the living room menu.
- - - - - - - - -
Telephone Screen
- - - - - - - - - - - - - - - - - - - - - - - - - - - - - -
When you access a telephone on the street you can choose a new car.
Vehicle: Scroll Left and Right to view the available vehicles and the amount
of damage each one has sustained.
Ratings: On the right side will be the ratings for each vehicle. They are
based on a scale from 1 to 5.
- - - - - - -
Purchase Menu
- - - - - - - - - - - - - - - - - - - - - - - - - - - - - -
It's pretty simple. Whenever you talk to someone who has a $ sign on the radar
or access a shirt, you can purchase a vehicle or some new clothing using the
coins.
Just scroll Left and Right to view what is up for sale, as well as the price
of each one. You can also press X to view vehicle ratings.
------------------------------------------------------------------------------
2D. Controls and Techniques
------------------------------------------------------------------------------
- - - - - - - -
On Foot Control
- - - - - - - - - - - - - - - - - - - - - - - - - - - - - -
D-pad/control stick... Move character
B button.............. Attack (press in the air as well)
A button.............. Jump (press twice to high jump)
Y button.............. Get in car, talk to character
X button.............. Dash
L button.............. Camera Zoom
R button.............. Look up
Z button.............. no use
C-up, C-down.......... Zoom camera in or out
C-left, C-right....... Rotate camera left or right
Start button.......... Pause
There isn't much to say about the on foot control. If you have to turn while
holding X to run fast, do so by tapping X so that you don't make a wide turn.
It saves some time.
There is also a more powerful attack you can do by double-jumping and
pressing B.
- - - - - - - -
Vehicle Control
- - - - - - - - - - - - - - - - - - - - - - - - - - - - - -
D-pad................. Reset vehicle, press Down to change
angle in Bonus Game
Control stick......... Vehicle steering
B button.............. E-brake
A button.............. Accelerate
Y button.............. Get out of car
X button.............. Brake/reverse
L button.............. Brake/reverse
R button.............. Accelerate
Z button.............. Horn, boost in Bonus Game
C-up, C-down.......... Look up or look back
C-left, C-right....... Look left or right
Start button.......... Pause
The vehicle performance will often depend on the vehicle you choose. One sure
thing to remember is that when you're making a turn, ALWAYS hold B to use the
e-brake and make a really sharp turn. This will come in very useful for the
street races and later missions.
------------------------------------------------------------------------------
2E. Pick-ups
------------------------------------------------------------------------------
Coins: Coins can be found all over the place, as well as inside soda machines,
wasp cameras, crates, and other objects. If you can kick or run over it, it
will probably give up a coin.
Car repair: The yellow wrenches will repair the last vehicle you drove. They
can be found all over the place.
Collector Cards: The collector cards are found in certain places in each
level. Check section 6- for more details.
Mission pick-ups: Many of the missions will require you to pick up some type
of item. These are pointed out in the walkthrough.
------------------------------------------------------------------------------
2F. The Wanted Meter
------------------------------------------------------------------------------
The wanted meter isn't a problem for the most part, but occasionally (or
often when smashing stuff to collect coins), those damn cops can be a pain in
the rear end. Here's a few tips for avoiding or getting rid of the wanted
meter.
-You can also lose your wanted meter by getting out of
your vehicle and getting back in. That only works with
character vehicles, so if you're in a generic street
vehicle you will have to switch to a different one.
-You can also stay near one of the people that start a
wager race. When the wanted meter starts flashing, get
out of your vehicle and talk to the race person. From
there you can just cancel the race and the wanted meter
will be empty. Not bad at all, really.
-Destroying a car will usually raise your wanted-meter
by almost half, so don't get crash-happy.
==============================================================================
===== 3- MISSIONS WALKTHROUGH ================================================
------------------------------------------------------------------------------
3A. Level 1: From the Couch to Conspiracies
------------------------------------------------------------------------------
------------------------------------------------------------
The Cola Caper
------------------------------------------------------------
- - - - - - -
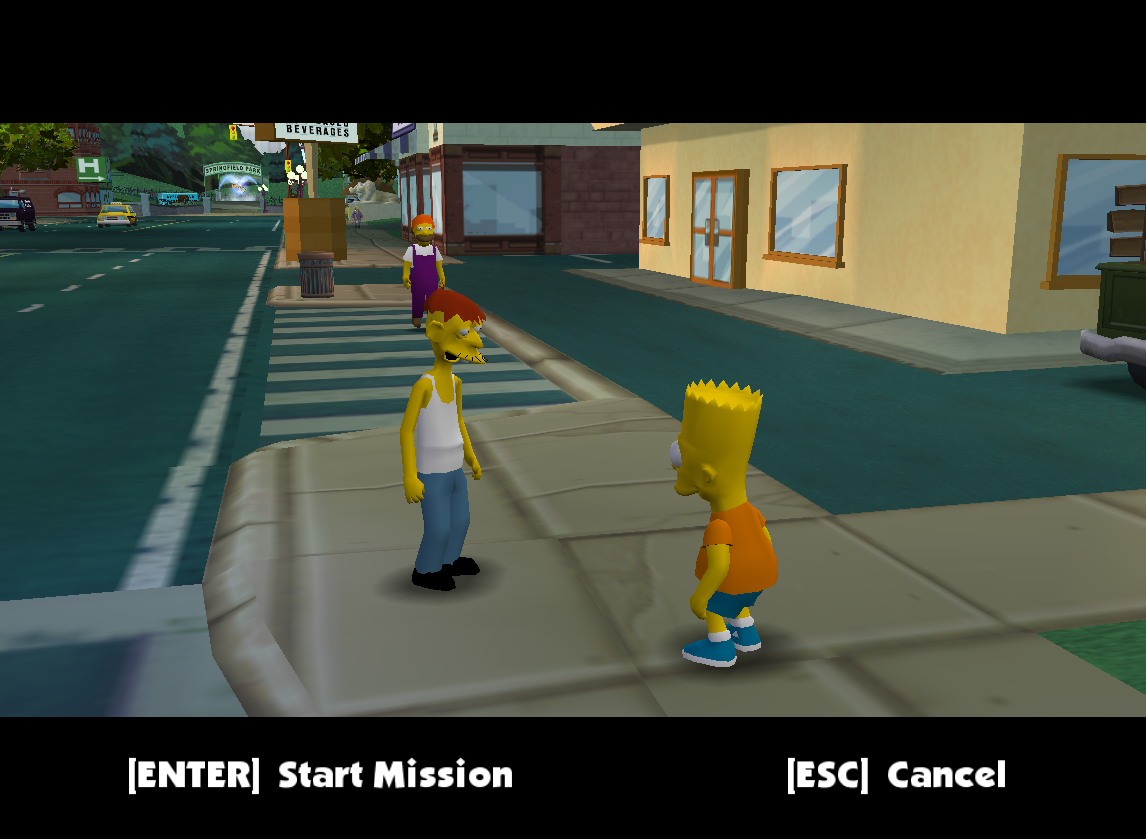
Mission Start
- - - - - - - - - - - - - - - - - - - - - - - - - - - - - -
Talk to Marge, who is outside the Simpsons' house.
- - - - - - - - - -
Mission Walkthrough
- - - - - - - - - - - - - - - - - - - - - - - - - - - - - -
News Flash: "90% of Video Games Start With an Easy Tutorial Level".
How very true. This first level is a piece of cake, or mini pies in this case.
Get into your vehicle and go to the left.
Now, you're supposed to follow the green arrows on the ground to get to
places, but they aren't always the best way. It's time to see the game's first
shortcut. Instead of following the road, go through the driveway of the light
blue house to find a shortcut to the street. It's a small one, but important
later on.
Follow the green arrows (or the radar, your choice) and you will eventually
arrive at the Kwik-E-Mart. Go inside the Kwik-E-Mart and talk to Apu to get
your junk food and complete the mission.
Well, say bye to The Cola Caper. This mission won't appear in the Mission
Select menu because of it's tutorial purposes. How cruel...
------------------------------------------------------------
S-M-R-T
------------------------------------------------------------
- - - - - - -
Mission Start
- - - - - - - - - - - - - - - - - - - - - - - - - - - - - -
Talk to Marge, who is outside the Simpsons' house.
- - - - - - - - - -
Mission Walkthrough
- - - - - - - - - - - - - - - - - - - - - - - - - - - - - -
Man, it must be a drag having to go to school AND work.
Start by picking up that human body science project thing from the lawn, then
get in a vehicle. Take off through the shortcut in the blue house and you
should run right into Skinner's yellow sedan.
This race isn't tough at all. Get ahead of Skinner and cut through any lawns
and parking lawns to get to the school. Just follow the green arrows to go
there.
Let me just mention this really quickly. Learn to cut through lawns and
parking lots now, because the later races get VERY difficult and you need to
take advantage of every shortcut possible.
Get out of the car once you're at the school and run inside. Look for Lisa in
the hall and talk to her to deliver the science project and complete the
mission.
------------------------------------------------------------
Petty Theft Homer
------------------------------------------------------------
- - - - - - -
Mission Start
- - - - - - - - - - - - - - - - - - - - - - - - - - - - - -
Talk to Marge, who is inside the Simpsons' house.
- - - - - - - - - -
Mission Walkthrough
- - - - - - - - - - - - - - - - - - - - - - - - - - - - - -
So Marge wants us to talk to Flanders.
Heh, yea. "Lost" items...
Drive to the right and follow the green arrows that way to find the tuxedo and
the lawnmower, then talk to Barney at the gas station (use the radar to find
him).
He'll tell you about the lawn chair, so turn around and follow that same road
back towards the Simpsons' house to find it and the portrait near the blue
house.
Go through the shortcut in the blue house and get to the Kwik-E-Mart to find
Rod's inhaler. Jump on top of the Duff truck and get it.
Now, just get back to Flanders' house! Go back down the road in that
direction, but pay attention on the right side for a shortcut. The shortcut
is right next to that blue house from that other shortcut, and it will lead you
straight to the Simpsons' and Flanders' house.
Talk to Ned to complete the mission. Stupid Flanders...
------------------------------------------------------------
Office Spaced
------------------------------------------------------------
- - - - - - -
Mission Start
- - - - - - - - - - - - - - - - - - - - - - - - - - - - - -
Talk to Marge, who is inside the Simpsons' house.
- - - - - - - - - -
Mission Walkthrough
- - - - - - - - - - - - - - - - - - - - - - - - - - - - - -
Off we go to see our pal Lenny.
After talking to Lenny you will need to buy the Plow King from Barney. Some
good places to find coins are the backyard area of the Simpsons' house (as
well as the two neighboring houses), and on the roofs of the buildings near
the Kwik-E-Mart.
Buy the Plow King when you have enough cash and the mission will begin.
Drive back down the road to the Kwik-E-Mart, then start bashing into Smithers'
limo. The thing is incredibly weak, so just get a few clean hits from the side
and it should be a quick mission.
------------------------------------------------------------
Blind Big Brother
------------------------------------------------------------
- - - - - - -
Mission Start
- - - - - - - - - - - - - - - - - - - - - - - - - - - - - -
Drive to the power plant and go inside Homer's workstation.
- - - - - - - - - -
Mission Walkthrough
- - - - - - - - - - - - - - - - - - - - - - - - - - - - - -
Press Y at that terminal and the mission will start.
So Homer is worried that sexy girls will watch him through the camera? Oy,
such a dumb guy he is.
Well, now go outside and turn left to destroy that first power coupling. Push
the red button and jump up to the next walkway to destroy two more.
Jump on the platforms on the right to kick that one lonely coupling on top,
then jump across the gap to the next one. If you fall through the grating you
can use the steam ducts at the bottom to jump back up.
Once you're at the top, push the red button and cross the gap to get the sixth
coupling, then run down the walkway and destroy the next two. Jump the next
gap and run to the end of the walkway to kick the last one.
Return to the workstation for a well deserved nap... d'oh!
------------------------------------------------------------
Flowers By Irene
------------------------------------------------------------
- - - - - - -
Mission Start
- - - - - - - - - - - - - - - - - - - - - - - - - - - - - -
Drive to the Simpsons' house.
- - - - - - - - - -
Mission Walkthrough
- - - - - - - - - - - - - - - - - - - - - - - - - - - - - -
All right, it's our first chase mission! Run out to the front yard and get in
any vehicle faster than the Plow King.
Chase missions just require you to stay as close to the opponent as possible.
You can be in front or behind, it doesn't matter.
With that said, I can just tell you that this guy is going straight to the
power plant. Stay close behind if you're still not sure which way to go.
Once in the power plant the black van will actually go through and end up in
a long tunnel. Follow it through the tunnel to end up on the other side of
the level, in the rich area.
The black van will lead you straight to Burns' mansion. We should have
known...
------------------------------------------------------------
Bonestorm Storm
------------------------------------------------------------
- - - - - - -
Mission Start
- - - - - - - - - - - - - - - - - - - - - - - - - - - - - -
Drive to the grocery store and talk to Marge.
- - - - - - - - - -
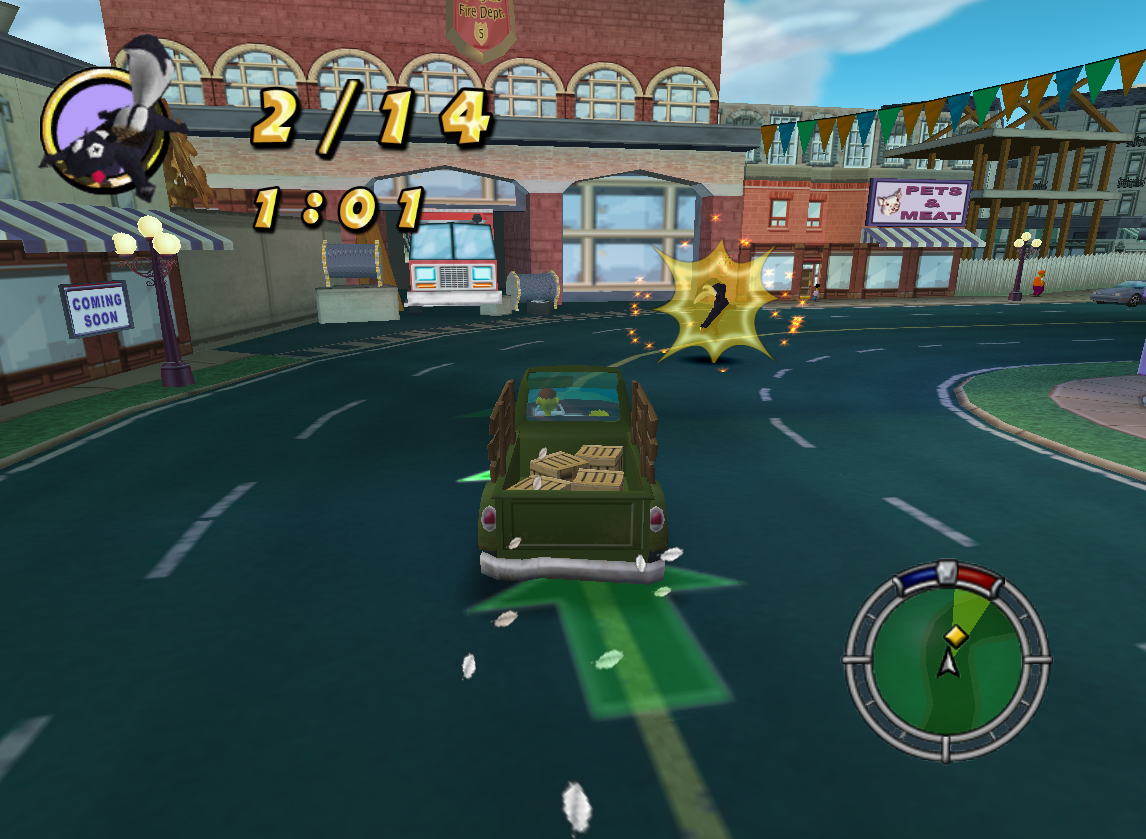
Mission Walkthrough
- - - - - - - - - - - - - - - - - - - - - - - - - - - - - -
So there are strange black vans spying on Springfield. Who cares. We must stop
the distribution of violent, yet very enjoyable, video games!
Well now we have to both damage a vehicle and collect the items that it drops.
To do this just ram into any part of the truck and pick up the items it drops.
Use the radar to keep track of it's location.
Stick to the truck's tail end and you'll get the 10 boxes in no time flat.
------------------------------------------------------------
The Fat and Furious
------------------------------------------------------------
- - - - - - -
Mission Start
- - - - - - - - - - - - - - - - - - - - - - - - - - - - - -
Drive to the power plant and talk to Carl.
- - - - - - - - - -
Mission Walkthrough
- - - - - - - - - - - - - - - - - - - - - - - - - - - - - -
Sweet, another race! And against that pansy, Smithers.
I hope you've been remembering those shortcuts because you will need them for
this race. Follow the arrows as always, and remember to cut through the lawns
and parking lots as much as possible.
Talk to Mr. Burns at the end to find out the real origin of the black vans.
------------------------------------------------------------
This Old Shanty (Bonus)
------------------------------------------------------------
- - - - - - -
Mission Start
- - - - - - - - - - - - - - - - - - - - - - - - - - - - - -
Talk to Cletus at his shack near the trailer park.
- - - - - - - - - -
Mission Walkthrough
- - - - - - - - - - - - - - - - - - - - - - - - - - - - - -
Start off by getting in your vehicle, then turn around and head back toward
the bridge. Collect the first cardboard tube on the right side, then the
other tube in the gas station on the other side.
Follow the road and stick to the left side to find the next two tubes, then
grab the last tube in front of Flanders' house.
It's not over yet! Now turn around and head back toward Cletus' house, but
keep going as if you were headed to the power plant. Along the way you'll run
into a field of glowing tomacco plants.
Drive into the field and start collecting all of the tomacco. You'll most
likely get a Hit & Run, but ignore the cops and keep collecting.
When you're set drive back to Cletus' house and drop off the tomacco. Remember
to cut through the trailer park.
Congratulations, you've just unlocked Cletus' Pickup Truck!
------------------------------------------------------------------------------
3B. Level 2: The Hunt for Bonestorm 2
------------------------------------------------------------------------------
------------------------------------------------------------
Detention Deficit Disorder
------------------------------------------------------------
- - - - - - -
Mission Start
- - - - - - - - - - - - - - - - - - - - - - - - - - - - - -
Talk to Milhouse at the town square.
- - - - - - - - - -
Mission Walkthrough
- - - - - - - - - - - - - - - - - - - - - - - - - - - - - -
So Skinny boy thinks he can beat Bart to the Try-N-Save, ey? Hah, kids will go
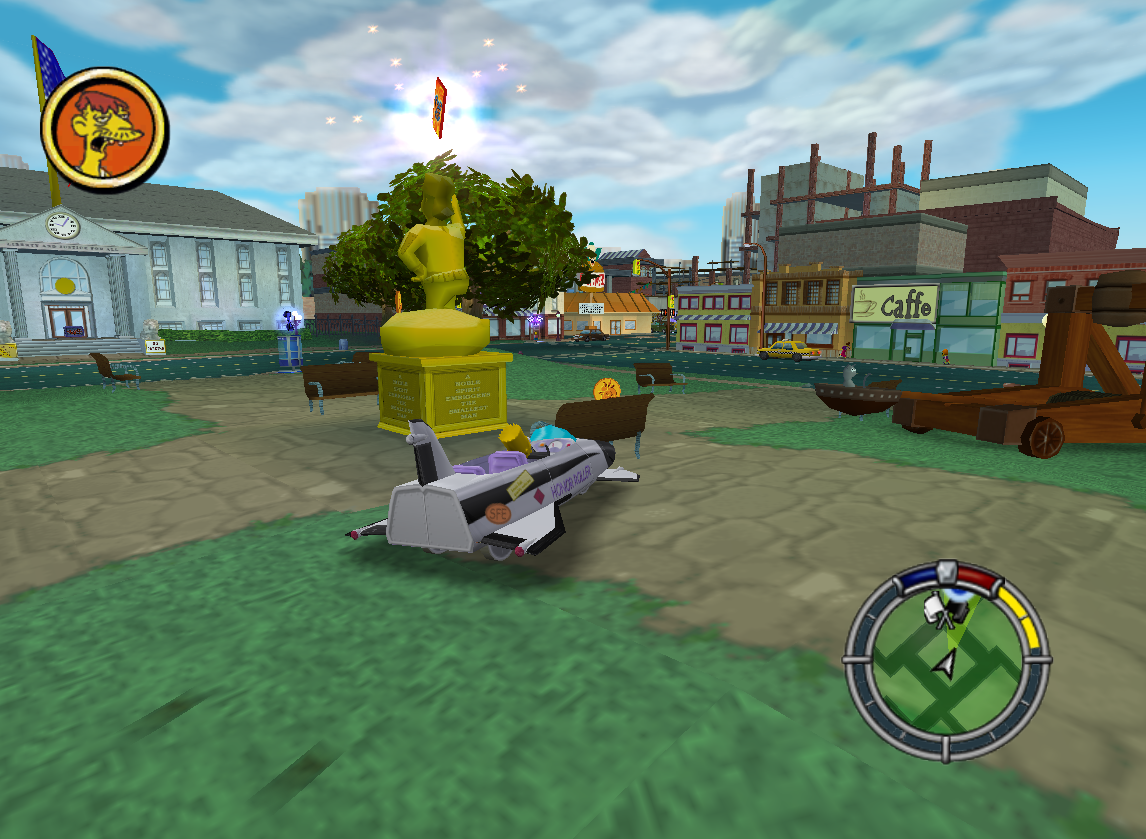
through anything for ultra-violent video games!
Start by getting into your vehicle, which should be the Honor Roller right
there next to you. It's the best vehicle at this point.
Now just follow the radar and arrows toward the bad part of town. As soon as
you get on the street it's blatantly obvious that the dirt pile with the DO
NOT CROSS sign is a shortcut, so step on it and take the shortcut through the
building (this one will become very important later on).
Skinner will be on you as soon as you reach the other side. Now it's time for
some good ol' evading. With this type of mission you have to lose someone who
is on your tail.
Speed up and the red bar at the top should go pretty far down, and to finally
lose Skinner cross through a narrow street with some potholes in it. Skinner's
bucket of a car won't make it through the potholes as easily.
Now follow the radar and arrows and you'll cross through a trains section.
There is another shortcut through the trains on the right if you want to try
it out.
Follow the street until you get to the Try-N-Save, then talk to Jimbo in the
parking lot.
Bad news...
------------------------------------------------------------
Weapons of Mass Delinquency
------------------------------------------------------------
- - - - - - -
Mission Start
- - - - - - - - - - - - - - - - - - - - - - - - - - - - - -
Drive to Herman's Military Antiques and talk to Kearney.
- - - - - - - - - -
Mission Walkthrough
- - - - - - - - - - - - - - - - - - - - - - - - - - - - - -
So the latest fad is illegal fireworks. Chinese sky candy is hard to come by,
so we'll need to check several places.
Start by driving over to Moe's Tavern (follow the arrows, as always) and talk
to Otto. Go inside Moe's and talk to Moe to pick up the first batch.
Now get back outside and drive yourself all the way to Town Hall. Snake will
be waiting for you with another bag of fireworks.
Now get back to the vehicle and follow the arrows to get to the Police Station
over in the downtown area. Follow the arrows through the underpass to get
there.
Talk to Ralph in front of the Station and he'll give you a rather ominous
warning. Yea right, Chief Piggum won't do anything...
Damn, he will. Take off and try to force Wiggum to crash into something (like
a building near the Station). Once you do, drive back to that underpass tunnel
and burn rubber. Wiggum should get lost fairly easily.
------------------------------------------------------------
Vox Nerduli
------------------------------------------------------------
- - - - - - -
Mission Start
- - - - - - - - - - - - - - - - - - - - - - - - - - - - - -
Talk to Comic Book Guy in front of the Googoplex.
- - - - - - - - - -
Mission Walkthrough
- - - - - - - - - - - - - - - - - - - - - - - - - - - - - -
We need that copy of Bonestorm 2, damn it. Perhaps good ol' Comic Book Guy can
come through with a copy.
This race is a bit tough... until you try it five or six times. All the basic
race rules apply like always accelerating, using B for sharp turns, always
taking the inside track on curves, and making the other guy crash into stuff.
Here are a few key points that can win the race for you:
-Turn left at the beginning to get ahead of the nerd.
-Take the inside track on the underpass tunnel and stay
ahead of the nerd and he might crash into something.
-Drive to the left as soon as you come out of the tunnel.
-Cut through the left side of the Town Hall lawn and head
straight through the turn in the street ahead.
Man, this tub of lard was no help either. But he thinks Professor Frink can
assist in the search.
------------------------------------------------------------
Bart 'n' Frink
------------------------------------------------------------
- - - - - - -
Mission Start
- - - - - - - - - - - - - - - - - - - - - - - - - - - - - -
Drive to Springfield Stadium and talk to Professor Frink.
- - - - - - - - - -
Mission Walkthrough
- - - - - - - - - - - - - - - - - - - - - - - - - - - - - -
Oy, more errands for these nerdy fellows.
Anyway, get in your vehicle quickly and start following that pizza van. It
will be a red arrow on your radar. The van isn't exactly a fast vehicle, so
follow along and it'll take you straight to Herman's.
Holy crap, the radio has been stolen! Gee, I wonder who took it (HINT... who's
face is that in the corner?). So get back in your vehicle and follow those
lovely arrows straight to Snake who is waiting for you on the expressway.
It's race time once again. You should be able to pass Snake on the expressway,
as well as making him crash into other vehicles (make sure you take the inner
track on curves).
The downtown area will have more obstacles (much like the nerd race), and the
finish line will be at the road to the underpass.
Collect the radio to continue.
------------------------------------------------------------
Better Than Beef
------------------------------------------------------------
- - - - - - -
Mission Start
- - - - - - - - - - - - - - - - - - - - - - - - - - - - - -
Talk to Cletus at the Krusty Burger near the town square.
- - - - - - - - - -
Mission Walkthrough
- - - - - - - - - - - - - - - - - - - - - - - - - - - - - -
Git yer ass in gear and pick up all them purty flatmeats! There are 14 of
them, and our lucky green arrows shall lead the way. You can also check the
yellow spots on the radar.
Follow the road along and you'll end up in the bad part of town with 14
roadkills in your truck. Now bust a U-turn and head straight back to Krusty
Burger.
When you approach Krusty Burger, don't slow down! Hold down that acceleration
button and keep following the road because now Apu will be on you. If you kept
driving like I told you it shouldn't be a problem.
Git that satellite dish to go to the next mission.
------------------------------------------------------------
Monkey See Monkey D'oh
------------------------------------------------------------
- - - - - - -
Mission Start
- - - - - - - - - - - - - - - - - - - - - - - - - - - - - -
Go to Springfield Stadium and talk to Professor Frink.
- - - - - - - - - -
Mission Walkthrough
- - - - - - - - - - - - - - - - - - - - - - - - - - - - - -
So Frink now needs a blender. Let's go visit Dr. Nick at the Screaming Monkey
Research Center.
Dr. Nick might be able to help, but first we have to collect all of his
escaped monkeys! The puny vehicle you have is too small (forget about the Plow
King), but it seems Homer's Mr. Plow is an option.
You will now need 200 coins to buy the truck from Homer in the hospital
parking lot. If you need cash try the Buzz Cola machines at the stadium, the
machine at Krusty Burger, or the crates at Town Hall and the hospital.
Talk to Homer when you have the cash and you can buy the Mr. Plow truck and
start the mission.
This one isn't tough at all, as long as you follow the radar. There will be
a yellow light that will lead you in the right direction to get them all, but
not to each individual monkey. Most of the monkeys will be in plain sight,
but some might be hard to see:
-On the roof near the Research Center.
-Near the fountain.
-One will be through that shortcut in the construction
building. Use the sand ramp to get it.
After collecting all the monkeys return them to Dr. Nick. Now that the monkeys
are back with their tormentor, get your blender.
------------------------------------------------------------
Cell-Outs
------------------------------------------------------------
- - - - - - -
Mission Start
- - - - - - - - - - - - - - - - - - - - - - - - - - - - - -
Talk to Professor Frink (again) at the stadium.
- - - - - - - - - -
Mission Walkthrough
- - - - - - - - - - - - - - - - - - - - - - - - - - - - - -
This one is absurdly simple. Frink wants all the cell phone users out of
commission, so keep the Mr. Plow truck and get ready for some demolition.
Chase that first cell car and start bashing into it inside the tunnel. It's
best to crash the car against the walls. Once you get to the downtown area you
will start seeing more cell cars.
They will come out one at a time and all you have to do is destroy them.
Head-on collisions will take 75%-90% damage, but you can also smash the cars
when they are making turns. A good side hit can work wonders.
Once you're done you can go back and talk to Frink to see the truck-a-saurus
perform. Among other things...
------------------------------------------------------------
Dial B for Blood (Bonus)
------------------------------------------------------------
- - - - - - -
Mission Start
- - - - - - - - - - - - - - - - - - - - - - - - - - - - - -
Drive to the bad part of town and look for the Veterans of Unpopular Wars
building. It is right across from Herman's Military Antiques. Talk to Grampa.
- - - - - - - - - -
Mission Walkthrough
- - - - - - - - - - - - - - - - - - - - - - - - - - - - - -
I know old people give their stuff away too easily sometimes, but their blood?
Ah well, it is Grampa.
Pick up that first sack of blood from the Plasma Center and get in your
vehicle. Now drive over to Moe's Tavern (take the shortcut through the car
wash parking lot.
Go inside Moe's and talk to him to get some, um, different blood. Then get
back outside and into your vehicle.
Drive up the street to the Krusty Burger near the construction building and
talk to squeaky-voiced teen. No time for fries, Grampa needs his blood!
Burn rubber back to the veterans' building and talk to Grampa to drop off
the blood. His WWII Vehicle will be your reward.
------------------------------------------------------------------------------
3C. Level 3: Oh Bart, Where Art Thou?
------------------------------------------------------------------------------
------------------------------------------------------------
Nerd Race Queen
------------------------------------------------------------
- - - - - - -
Mission Start
- - - - - - - - - - - - - - - - - - - - - - - - - - - - - -
Talk to Comic Book Guy at the Android's Dungeon.
- - - - - - - - - -
Mission Walkthrough
- - - - - - - - - - - - - - - - - - - - - - - - - - - - - -
Ay, we start with another nerd race. You'll be using CBG's same ol' rickety
car, but as long as you use the shortcuts you'll have no problem.
There are four shortcuts going down the hill that you will HAVE to remember.
They are very important for the later missions.
The first shortcut is a set of stairs lined with palm trees. This will cut
right through the block without the time wasted going around.
The next shortcut is immediately after the stairs, to the right. It's through
the gas station building.
The third shortcut is at the bottom of the hill ahead, between the Aztec
Theatre and Krusty Burger. There will be some type of log machine blocking the
way, so wait for it to move up before racing through.
The final shortcut is just ahead. It's a huge ramp that leads straight through
a Burns' Casino sign and will drop you at the beginning of the Squidport. Make
sure to have a fast vehicle or you may not make it.
Right so we left that nerd eating dust somewhere at the top. But now you have
to get the comic book back to the shop before it ends up in near-mint
condition. Heaven forbid!
Follow the arrows and head back up the street. You can use the bowling alley
and palm tree shortcuts going back up as well, though you don't need 'em that
badly.
------------------------------------------------------------
Clueless
------------------------------------------------------------
- - - - - - -
Mission Start
- - - - - - - - - - - - - - - - - - - - - - - - - - - - - -
Drive to the Noiseland Arcade (near Android's Dungeon), and talk to Milhouse.
- - - - - - - - - -
Mission Walkthrough
- - - - - - - - - - - - - - - - - - - - - - - - - - - - - -
You heard the kid, get movin'! Get in a vehicle and drive down the street to
Wall E. Weasel's. Is that Milhouse?
So now Bart is at the Planet Hype, which is all the way down in the Squidport.
Take all the usual shortcuts to get down there and pull into the Squidport.
Now talk to... Milhouse?!
Is this kid jerkin' us around? Anyway, Bart is now at the Springfield sign.
Hop into a fast vehicle and take off through the Squidport.
There is a small shortcut through an alley right next to Planet Hype, and
from there just burn rubber through the pier. The road will take you past
Krustylu Studios and up into the mountain until you reach a large Springfield
sign. Guess who's already there.
Milhouse doesn't know jack squat, but maybe Apu can lend a hand.
------------------------------------------------------------
Bonfire of the Manatees
------------------------------------------------------------
- - - - - - -
Mission Start
- - - - - - - - - - - - - - - - - - - - - - - - - - - - - -
Drive to the Krusty Burger near Android's dungeon and speak to Apu.
- - - - - - - - - -
Mission Walkthrough
- - - - - - - - - - - - - - - - - - - - - - - - - - - - - -
It looks like Apu gets his revenge for the previous level. This mission
involves bashing into Cletus and collecting all the flatmeat he drops, but
there's a time limit.
There are two guaranteed ways to get some flatmeat to drop. The first way
is a head-on collision, which may be difficult since you're chasing the guy.
The second way is a side hit. To get a side hit just accelerate and press B
when you're on Cletus' side. A direct side hit or a fishtail (when the truck
swerves out of control) will both get you a nice piece of roadkill.
Collect the 15 required roadkills, then bust a U-turn and head back up the
mountain toward the Observatory. It's the big domed building at the mountain
summit.
Talk to ol' Frinky and we shall move along.
------------------------------------------------------------
Operation Hellfish
------------------------------------------------------------
- - - - - - -
Mission Start
- - - - - - - - - - - - - - - - - - - - - - - - - - - - - -
Talk to Grampa at the Observatory.
- - - - - - - - - -
Mission Walkthrough
- - - - - - - - - - - - - - - - - - - - - - - - - - - - - -
And in the end it was Grampa who would provide a worthwhile clue. You'll need
the school bus for this mission, so get down to Kamp Krusty (near the broken
bridge). Take the wooden bridge on the right and talk to Otto.
If you need cash there are tons of Buzz Cola machines and Buzz Cola crates
at Krustylu Studios.
Once you have the bus it's clobberin' time! Go collect Bart's lucky cap at
the Observatory and turn left a bit to crash into a black sedan with a red
siren.
This mission is just like the Apu mission. A head-on collision will take
nearly all their health, and side hits can cause a lot of damage as well.
The first sedan will be that one at the Observatory, then one at the Aztec
Theatre, and the final sedan will be at the Squidport. Piece of cake.
------------------------------------------------------------
Slithery Sleuthing
------------------------------------------------------------
- - - - - - -
Mission Start
- - - - - - - - - - - - - - - - - - - - - - - - - - - - - -
Talk to Chief Wiggum at Burns' Casino.
- - - - - - - - - -
Mission Walkthrough
- - - - - - - - - - - - - - - - - - - - - - - - - - - - - -
Our last hope of finding Bart lies with Wiggum. He'll help (I think) but
first you need some clothes to go undercover. You can go to the Android's
Dungeon or the Observatory to buy Lisa's Cool costume for 250 coins.
Drive back to the casino when you're set and run inside the blue circle.
Now you have to chase Snake and pick up the three items he drops. The first
item will drop near the beginning, the second item will drop at the palm
tree shortcut, and the third item will drop at the broken bridge. As soon as
you get the third item turn around and quickly head back to the casino.
Wiggum will finally give us a solid lead as to Bart's whereabouts.
------------------------------------------------------------
Fishy Deals
------------------------------------------------------------
- - - - - - -
Mission Start
- - - - - - - - - - - - - - - - - - - - - - - - - - - - - -
Drive to Captain McCallister's Chum 'N' Stuff (at the Squidport) and talk to
the sea captain.
- - - - - - - - - -
Mission Walkthrough
- - - - - - - - - - - - - - - - - - - - - - - - - - - - - -
Yaarrrrr, nobody helps us fer free. The sea captain needs you to collect some
fish.
This is a basic collect mission. Choose a fast vehicle and just follow the
yellow dots on the radar. The last fish will be over the gap of the broken
bridge.
Real easy, now let's see what the sea captain knows.
------------------------------------------------------------
The Old Pirate and the Sea
------------------------------------------------------------
- - - - - - -
Mission Start
- - - - - - - - - - - - - - - - - - - - - - - - - - - - - -
Talk to the sea captain at the Squidport.
- - - - - - - - - -
Mission Walkthrough
- - - - - - - - - - - - - - - - - - - - - - - - - - - - - -
Is this finally it?
Choose a hefty vehicle (Mr. Plow is tough and faster than the big ones) and
chase that limo. Just like the other times any good side hit can take care of
business, though the narrow streets also work great for crushing the limo on
the turns. You can also knock the limo to the right side of the Squidport, in
that lower ramp near the beach. It will get stuck and give you the perfect
opportunity to ram it head on.
Darn, we blew it up! Drive back to the Squidport and talk to the sea captain.
So Bart got away and got on board the C-Spanker. Get a fast vehicle and head
to the very left side of the dock. You should be looking right at the huge
ship, and there should be a GLOBEX sign. If you have all that, accelerate and
the ramp next to the ship will send you straight inside.
Slow down and stop when you get outside on top of the ship. Get out and jump
onto the gap on the right side. Run around the crate to the other side and
follow the radar to find Bart.
At last! Praise the lord for this boy hath been found!!!
------------------------------------------------------------
Princi-Pal (Bonus)
------------------------------------------------------------
- - - - - - -
Mission Start
- - - - - - - - - - - - - - - - - - - - - - - - - - - - - -
Start at the Wall E. Weasel's parking lot and make a left onto the street.
Follow the street and look for a blue circle on the radar. Talk to Principal
Skinner.
- - - - - - - - - -
Mission Walkthrough
- - - - - - - - - - - - - - - - - - - - - - - - - - - - - -
This mission is nothing new. Just speed up as much as possible and use all
the shortcuts.
After you pick up Skinner's "personal items", drive quickly and make sure to
take the shortcut next to Barney's Bowl-A-Rama and the palm tree shortcut.
------------------------------------------------------------------------------
3D. Level 4: An Evening With Marge
------------------------------------------------------------------------------
------------------------------------------------------------
For A Few Donuts More
------------------------------------------------------------
- - - - - - -
Mission Start
- - - - - - - - - - - - - - - - - - - - - - - - - - - - - -
Talk to Bart inside the Simpsons' house.
- - - - - - - - - -
Mission Walkthrough
- - - - - - - - - - - - - - - - - - - - - - - - - - - - - -
Well, let's go find ol' Wiggy. As soon as you get in your vehicle his police
car will zoom right past the Simpsons' house. He doesn't go too fast, so stay
on his tail and you'll end up at Lard Lad's Donuts.
It seems he has a donut monkey on his back and before he'll tell us anything
we need to find some donuts. Get back in your vehicle and wait for the donut
truck to pass by. Ram into the donut truck to get donuts out of it. This is
just like a few of the earlier missions where any good side hit will get a
dropped item.
Turn around after you've gathered the 10 donuts and go back to Lard Lad's and
talk to Wiggum again to get the location of the crop circle.
------------------------------------------------------------
Redneck Roundup
------------------------------------------------------------
- - - - - - -
Mission Start
- - - - - - - - - - - - - - - - - - - - - - - - - - - - - -
Talk to Cletus at his shack in the hick part of town.
- - - - - - - - - -
Mission Walkthrough
- - - - - - - - - - - - - - - - - - - - - - - - - - - - - -
We need to see that crop circle, dag blast it! Take off after Cletus, but you
also have to pick up every item he drops.
Chasing him is no problem, but it might sometimes be a hassle if you have to
reverse to get an item you missed. I suggest using a faster car, and if you
want to know at what points he'll drop items:
-Near his shack at the start of the chase.
-Near the tomacco field.
-Inside one of the tunnels in the power plant.
-In front of Burns' mansion.
-Just before the bridge jump.
-Near the school.
-Near the gas station.
------------------------------------------------------------
Ketchup Logic
------------------------------------------------------------
- - - - - - -
Mission Start
- - - - - - - - - - - - - - - - - - - - - - - - - - - - - -
Talk to Cletus at the gas station next to the Kwik-E-Mart.
- - - - - - - - - -
Mission Walkthrough
- - - - - - - - - - - - - - - - - - - - - - - - - - - - - -
Geez, now we're friggin' farmers. You'll need to buy Marge's Inmate costume
for 300 coins, and the closest place would be the Kwik-E-Mart. If you need
cash you can search near the Simpsons' house and around the Kwik-E-Mart.
Once you have the orange jumpsuit on, go back and get in Cletus' truck.
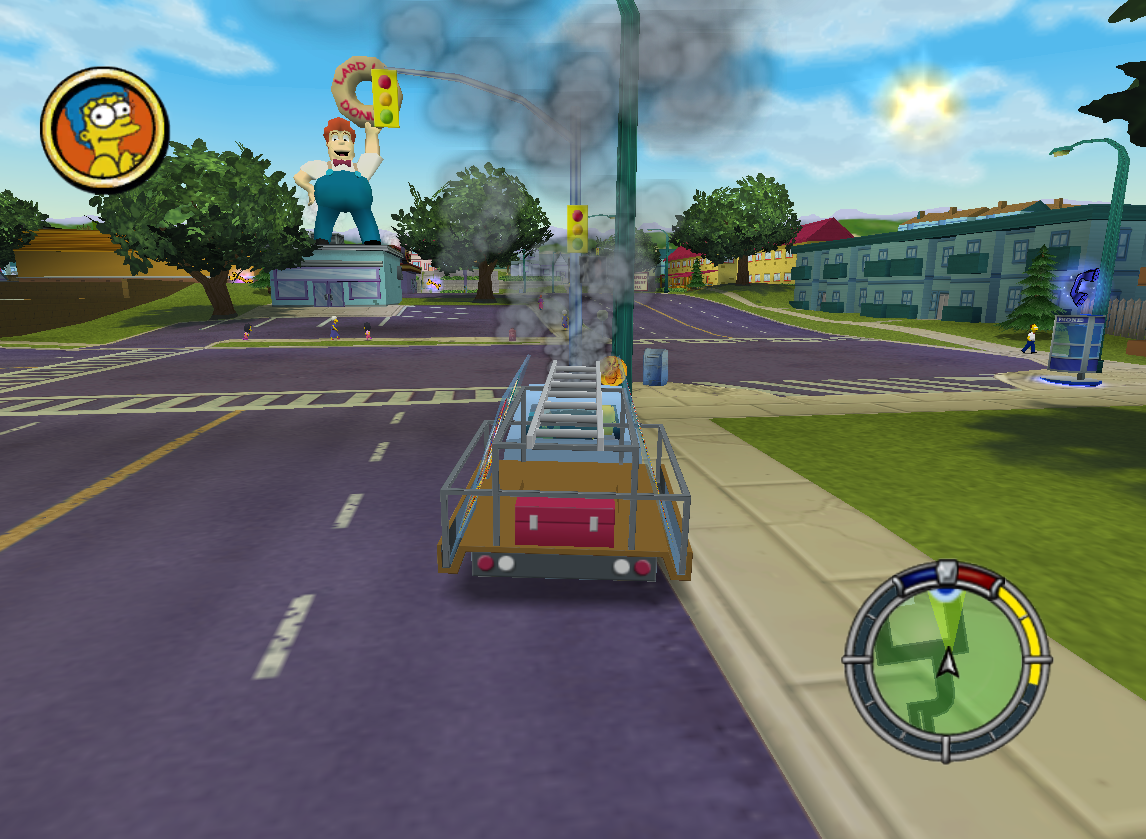
Oh, harvest KETCHUP. Get going quickly and grab the packet straight ahead.
It'll be a left turn from there for another packet, then another left turn.
Drive straight up the fire engine ladder to get the third.
From here they're all pretty easy to spot as long as you pay attention to the
radar and which way it's pointing. You'll end up going through Burns' mansion
and coming out inside the power plant.
The final ketchup packet is over a jump so go to the left (through the
Stonecutters' tunnel) and turn around. Press on the accelerator and gather
enough speed to make the jump that's right in the center of the power plant
and get the last packet.
The final thing to do is drop of Cletus at his shack, but one of those black
sedans will be on you as soon as you leave the power plant. He should be easy
to lose if you cut through the field next to the red cow barn.
Pull into Cletus' shack to finish the mission.
------------------------------------------------------------
Return of the Nearly-Dead
------------------------------------------------------------
- - - - - - -
Mission Start
- - - - - - - - - - - - - - - - - - - - - - - - - - - - - -
Talk to Hans Moleman at the cemetary.
- - - - - - - - - -
Mission Walkthrough
- - - - - - - - - - - - - - - - - - - - - - - - - - - - - -
Grampa must have some useful info, but you have to get there before Chief
Wiggum locks the doors.
This race is a joke. It goes without saying that you should have a fast
vehicle (though I'm saying it because there are those people who just have
to try and race with the Plow King).
Wiggum will probably get held up on the road between the Simpsons' house and
the Kwik-E-Mart, giving you the perfect opportunities to pass him or get a
good lead.
------------------------------------------------------------
Wolves Stole My Pills
------------------------------------------------------------
- - - - - - -
Mission Start
- - - - - - - - - - - - - - - - - - - - - - - - - - - - - -
Talk to Grampa at the Retirement Castle.
- - - - - - - - - -
Mission Walkthrough
- - - - - - - - - - - - - - - - - - - - - - - - - - - - - -
Man, bullies nowadays steal anything and everything. Grab a vehicle and hurry
on over to the school. Don't forget about the shortcut on the left side of
the entrance.
Talk to Nelson at the baseball diamond only to find out that he traded the
medication for Playdudes. Good trade...
But we still need those meds, so get back in your vehicle and drive to the
front of the school to find the black sedan. It's chasin' time.
Follow the black sedan and collect all the meds that get dropped. Remember not
to go TOO fast or you may pass by an item.
Once you get the last item in the rich area, turn around and go back to the
Retirement Castle. As you pass the school a black sedan will start chasing
you. Evade it by cutting between cars and near obstacles, and try taking the
shortcut on the left in front of the church. This shortcut goes through a
narrow alley and a long jump over some wrecked vehicles.
Drop off the meds with Grampa and get right back in your vehicle because this
old guy has fallen asleep. Go to the Kwik-E-Mart and get some caffeine pills
to wake him up.
------------------------------------------------------------
The Cola Wars
------------------------------------------------------------
- - - - - - -
Mission Start
- - - - - - - - - - - - - - - - - - - - - - - - - - - - - -
Talk to Bart in his room from the backyard window.
- - - - - - - - - -
Mission Walkthrough
- - - - - - - - - - - - - - - - - - - - - - - - - - - - - -
It's time to kick conspiracy butt as officer Marge. You're already in Bart's
room, so buy the Police costume. Check yourself in the mirror to start the
mission.
This mission will be entirely on-foot (the first one of it's kind I believe).
Start by getting the one in the Simpsons' treehouse then just follow the path
of soda cans that lead you to the Kwik-E-Mart.
Use the steam vent on top of the Duff truck to get all the soda cans up there.
Then jump down and use the billboard next to the gas station to get on that
roof and collect all the cans.
The third spot to go to is the Lard Lad's Donuts roof. Use the steam vent
behind the building. Jump down when you're done and collect all the donuts in
the parking lots to complete the mission.
------------------------------------------------------------
From Outer Space
------------------------------------------------------------
- - - - - - -
Mission Start
- - - - - - - - - - - - - - - - - - - - - - - - - - - - - -
Talk to Apu in the Kwik-E-Mart.
- - - - - - - - - -
Mission Walkthrough
- - - - - - - - - - - - - - - - - - - - - - - - - - - - - -
Ah, so the cola's the thing...
Get in a vehicle with toughness and some speed (Canyonero) and start
following the Buzz Cola trucks. They give you a whole 2 minutes to destroy
each one.
When destroying a vehicle, head-on collisions (with a vehicle or wall) will
take the most damage. You can also trap a vehicle between obtstacles and let
it destroy itself, though that may take too long.
You can destroy the second truck easily by following it through Burns'
mansion. Stay on it's tail when you go through the tunnel at the end in order
to crash right into it at the bottom of the tunnel. The truck won't stand a
chance with a wall in front and you behind.
So you destroyed all them three of them easily, just like I said. Drive on
over to the Simpsons' house.
Aw damn it, Wiggum is peeved because we took his precious cola away. Drive
through the driveway shortcut near the Simpsons' house and just drive down the
road without hitting anything. Wiggum will get lost without a problem.
Drive back to the Simpsons' house to complete the mission.
------------------------------------------------------------
Beached Love (Bonus)
------------------------------------------------------------
- - - - - - -
Mission Start
- - - - - - - - - - - - - - - - - - - - - - - - - - - - - -
Talk to Comic Book Guy next to the cemetary.
- - - - - - - - - -
Mission Walkthrough
- - - - - - - - - - - - - - - - - - - - - - - - - - - - - -
Sweet mother, is the tub of lard still dating the wrinkly sack of dust? I
guess so.
Get a fast vehicle and race over to the school. You can find one gift on the
front lawn, two on the baseball diamond, and just follow the rest of the gifts
to get on the roof and get them all.
Now get back in your fast vehicle and drive back to Comic Book Guy to complete
the bonus mission and unlock his Kremlin.
------------------------------------------------------------------------------
3E. Level 5: The Apu Redemption
------------------------------------------------------------------------------
------------------------------------------------------------
Incriminating Caffeine
------------------------------------------------------------
- - - - - - -
Mission Start
- - - - - - - - - - - - - - - - - - - - - - - - - - - - - -
Drive to the cola truck in the trains area.
- - - - - - - - - -
Mission Walkthrough
- - - - - - - - - - - - - - - - - - - - - - - - - - - - - -
Apu must redeem himself for selling a tainted product (he has a lot of
redeeming to do). He's decided to start by finding out who manufactured the
tainted Buzz Cola.
Get in your vehicle and the mission will begin. It's your basic chase and
collect mission, not very different from the previous ones you've encountered.
So follow the cola truck, not accelerating too much or you may pass an item.
Be careful not to get too far behind when the truck gets on the expressway
because there are different on-ramps to go through.
Once you grab the last item next to the Legitimate Businessman's Social Club
(AKA mob central), you're done.
------------------------------------------------------------
...and Baby Makes 8
------------------------------------------------------------
- - - - - - -
Mission Start
- - - - - - - - - - - - - - - - - - - - - - - - - - - - - -
Talk to Louie next to the mob hideout near Moe's Tavern.
- - - - - - - - - -
Mission Walkthrough
- - - - - - - - - - - - - - - - - - - - - - - - - - - - - -
The mafiosos have nothing to do with the evil soda running, but they still
think you shouldn't poke your nose in someone else's business.
The first limo to evade will appear as soon as you make your way to the
hospital. The limo will drive between two vehicles to get to you, so if you
stay on the left or right side and keep going it'll give you a big lead. It
shouldn't be a problem to lose the first limo.
You can get to the hospital by cutting through the fountain, but there will be
another limo waiting for you. Drive through the hospital driveway and then
take off. You can go either towards the bad part of town (where you just came
from), or to the tunnel that leads to downtown. BUT, don't go too far. If you
lose the limo but you're far away, you won't have any time left on the clock.
Once you lose the second limo just drive back to the hospital driveway.
------------------------------------------------------------
Eight is Too Much
------------------------------------------------------------
- - - - - - -
Mission Start
- - - - - - - - - - - - - - - - - - - - - - - - - - - - - -
Talk to Dr. Hibbert at the hospital.
- - - - - - - - - -
Mission Walkthrough
- - - - - - - - - - - - - - - - - - - - - - - - - - - - - -
Well gee golly gumdrop, now we get to gather diapers!
You'll need to buy the Car Built for Homer (The Homer as I call it) for 500
coins. Buy it from Homer in the hospital parking lot.
Once that is settled get in and pull out of the parking lot to find the red
Shelbyville van. This is your basic hit and collect mission where a good side
hit will make the vehicle drop an item.
Because this area has lots of obstacles like trees and uneven store fronts,
you can gather the items quickly by trapping the vehicle between you and an
obstacle. It'll drop items quicker than you can say "super caligraphic mega
expealidocious is a weird word but not as weird as this long sentence this
guy is making me read".
Drive back to the hospital and talk to Hibbert once you have the last item.
------------------------------------------------------------
This Little Piggy
------------------------------------------------------------
- - - - - - -
Mission Start
- - - - - - - - - - - - - - - - - - - - - - - - - - - - - -
Talk to Krusty at the Krusty Burger near the construction building.
- - - - - - - - - -
Mission Walkthrough
- - - - - - - - - - - - - - - - - - - - - - - - - - - - - -
Krusty isn't a big enough low-life scumbag, but if we follow Wiggum we may
find one. But first let's get some clothing that make Apu look American. The
closest place is Moe's Tavern, so head on over there and buy the American
costume for 425 coins. Man, Apu's level is becoming expensive.
Drive back to Krusty Burger and look at yourself in the window glass to start
the mission.
How do we find the police? By following the trail of donuts of course! Turn
the corner and grab the first donut to start.
The donuts are all in plain view, and even then you have the radar to help
out. It may become difficult in the slalom run through the tunnel, but just
slow down a bit. It'll waste more time to reverse for an item you passed.
Follow the donuts on through downtown and to the police station (which I
could've figured out without the trail of donuts, thank you).
Now get on Wiggum's tail and don't lose him. His police car is sort of fast,
but Wiggum is so wreckless he'll be crashing into everything is his path. Just
stay behind him and get ready to turn if one of the vehicles gets in your way.
The whole chase will be fairly easy and you'll end up at the DMV. Ah, Snake!
Lowest of the low-life scumbags.
------------------------------------------------------------
Never Trust a Snake
------------------------------------------------------------
- - - - - - -
Mission Start
- - - - - - - - - - - - - - - - - - - - - - - - - - - - - -
Talk to Snake at the DMV.
- - - - - - - - - -
Mission Walkthrough
- - - - - - - - - - - - - - - - - - - - - - - - - - - - - -
This time we're collecting garbage off the streets to get Snake's info. Don't
you just love this level?
Start by getting a fast vehicle (the Longhorn, perhaps) then start chasing
after the garbage truck. The thing is extremely slow, so just roll along
behind it and pick up the items.
The last item will be at the beginning of downtown. Well, not quite last. Now
you have to run all over this part of the level and colect more garbage.
I suppose there are different ways of doing this, but I have a path that
guarentees beating this mission. Start by driving to the monorail plaform
stairs and doing a fast U-turn so that the Longhorn is facing the direction
you just came from.
Now climb up the stairs and collect all the garbage along the way, then jump
across the monorail and get the next two on the roof.
Jump down from the roof and run to the concrete island in the middle of the
street circle. Get the four items there.
This next part is up to chance. You need to get into a SMALL car. Not an
ambulance or something, one of the small cars that have some speed. Take this
car and drive up the escalator next to the purple Sit & Rotate Room to get a
few more items.
Now drive to the alley behind the Krusty Burger. About halfway through the
alley there is gap between the buildings with two items. Park the car in there
and get the two items.
Run back into the alley and climb up the ramp. Get the items along the way and
then use the steam vents at the end to get on the roof of the building.
Collect those items.
Jump down and get back inside the small car you just had and drive to the
fire engine ladder ramp. Drive up the ramp slowly to get the items, then start
turning to the right at the end of the ladder. If you landed correctly you
should be facing the other way so you can grab the last two items.
Drive back to the street where you parked the Longhorn (under the monorail)
and get inside the Longhorn. Drive straight toward the expressway.
At the intersection the arrows will tell you to turn right, but DO NOT turn
right. Keep going straight and follow this road to take a shortcut jump over
the expressway.
Make a sharp right turn at the end and drive back to the DMV. Talk to Snake
and pick up the information inside the DMV.
Empty? Why that dirty son of a...
------------------------------------------------------------
Kwik Cash
------------------------------------------------------------
- - - - - - -
Mission Start
- - - - - - - - - - - - - - - - - - - - - - - - - - - - - -
Talk to Snake at the DMV.
- - - - - - - - - -
Mission Walkthrough
- - - - - - - - - - - - - - - - - - - - - - - - - - - - - -
Yea, sure. Community service...
Head over to the expressway, but take the left turn at the intersection. This
is that same shortcut from the previous mission. Head straight at the end
and Wiggum will start chasing you.
Drive into downtown and just drive through or near cars and obstacles to make
Wiggum slow down. You should be able to lose him easily by driving from one
end of downtown to the other.
Once Wiggum is off your case you can drive to the Googoplex and run into the
armored car.
Let me tell you, Snake's car is WEAK. It cannot take a good hit, so can you
imagine what will happen when trying to destroy an armored car.
But that doesn't matter because there is NO time limit! You could take all
day to destroy it if you wish. Not that you would want to.
The best way to destroy this vehicle is not to crash into it, but to make it
crash into obstacles. Just get alongside it and start to nudge it to the right
or left. Make sure there some obstacles on the side and the armored car will
keep crashing into them.
If your car starts smoking, STOP hitting anything. There are repair wrenches
at both ends of the expressway.
EXTRA TIP (sent in by Arjun Ratnayake):
You can also just sit by and let the armored car destroy itself as it drives
around town. Go make a sandwich or something and watch some TV, then come back
and finish it off with a few bumps.
Get back to the Snake's hideout after destroying the armored car. Wiggum will
be waiting for you, but you can lose him by driving through the street with
potholes near Snake's hideout.
Drop off Snake to FINALLY find out who the trucks belong to.
------------------------------------------------------------
Curious Curator
------------------------------------------------------------
- - - - - - -
Mission Start
- - - - - - - - - - - - - - - - - - - - - - - - - - - - - -
Talk to Bart next to the mob hideout near Moe's Tavern.
- - - - - - - - - -
Mission Walkthrough
- - - - - - - - - - - - - - - - - - - - - - - - - - - - - -
We're off to see the curator. Get going quickly and don't stop no matter what
(which shouldn't be a problem in Bart's new car).
Once you get to the museum the curator will try to escape, so chase after him!
His car is pretty fast, but all you need to do is cut him off at the turns. If
you manage to get a few good hits that crush the car between you and a wall or
obstacle then it should be over in the town square area.
Drive back to the museum to end the mission and reveal the evil mysterious
conspiracy of doom!
------------------------------------------------------------
Kinky Frinky (Bonus)
------------------------------------------------------------
- - - - - - -
Mission Start
- - - - - - - - - - - - - - - - - - - - - - - - - - - - - -
Talk to Professor Frink in front of The Java Server cafe.
- - - - - - - - - -
Mission Walkthrough
- - - - - - - - - - - - - - - - - - - - - - - - - - - - - -
Cool, a killer Hover Car. Frink wants you to chase it down and disable it by
crashing the hell out of it.
It's just like any other damage mission. Get in a fast and tough car and smash
the hover car between you and a wall. The turns are the perfect place to catch
it, but you can also sideswipe it on the road.
Drive back to The Java Server and talk to Frink to end the mission and unlock
the Hover Car as your own.
------------------------------------------------------------------------------
3F. Level 6: Go Speed Laser, Go!
------------------------------------------------------------------------------
------------------------------------------------------------
Going to the Lu'
------------------------------------------------------------
- - - - - - -
Mission Start
- - - - - - - - - - - - - - - - - - - - - - - - - - - - - -
Talk to Apu near the Android's Dungeon.
- - - - - - - - - -
Mission Walkthrough
- - - - - - - - - - - - - - - - - - - - - - - - - - - - - -
Apu wimped out after finding out who is behind the evil soda plot, so go ask
Otto for help. He agrees to give you a ride, though I don't think he realizes
it.
It's a basic collect mission. Make your way down the hill while following the
radar and you should get to Burns' Casino just fine. Start speeding up on the
hill before the casino because you have to use the ramp to make the jump.
Keep picking up kids at the Squidport until you have them all, then keep going
towards Krustylu Studios at the end of the docks.
------------------------------------------------------------
Getting Down with the Clown
------------------------------------------------------------
- - - - - - -
Mission Start
- - - - - - - - - - - - - - - - - - - - - - - - - - - - - -
Talk to Barney at Krustylu Studios.
- - - - - - - - - -
Mission Walkthrough
- - - - - - - - - - - - - - - - - - - - - - - - - - - - - -
Run and get into your Ferrini (the red sports car) and follow the promo truck.
It will go up the mountain and lead you to Krusty's limo.
Drive ahead of the limo and back up so you're blocking it's way, but you have
to face the same direction. Tap into the limo and hit the accelerate button
because the race will begin as soon as you hit the limo.
All of the shortcuts from last time are still here, so use them once you reach
the store area. The important shortcuts are the one in the gas station (after
the palm trees shortcut), and the shortcut next to the Aztec Theatre.
---
Here's some info from Hobo Joe:
With mission "4F2. Getting Down with The Clown" there's an easier way to do
the race, though it takes a little bit longer in setting up. Once you finish
the first task, park your car about two car-lengths ahead of Krusty's Limo.
Get out of the car and take control of any passing cars (preferrably bigger
trucks) and park them so that they block most of the entire road and so that
they box the Limo in. BE CAREFUL NOT TO TOUCH THE LIMO!
I think there's a limit on how many cars that are kept in memory, so if you
try to use too many cars, you'll find that they begin to disappear. So with a
few cars obstructing the limo, walk over to the limo and nudge it, causing
the race to officially begin. Then hop into your car and enjoy the extra grace
period you have to finish the race. It's a cheap and easy way to get it done,
but atleast it doesn't involve using cursed cheat codes.
---
Use the ramp at the end to land at the Squidport and find Krusty.
Another tip based on info from Paul Partridge:
So it seems you don't even have to race the limo. Just head the opposite way
(preferably with a fast car) and getting 1st place will be a breeze.
------------------------------------------------------------
Lab Coat Caper
------------------------------------------------------------
- - - - - - -
Mission Start
- - - - - - - - - - - - - - - - - - - - - - - - - - - - - -
Talk to Krusty at the Squidport.
- - - - - - - - - -
Mission Walkthrough
- - - - - - - - - - - - - - - - - - - - - - - - - - - - - -
In the end, isn't it always the nerds who save the day? Get in a fast vehicle
and start following Frink from the Squidport.
There's not much else to say that's new information. If you're here then
you've already played plenty of chase missions. Just follow Frink where ever
his wacky Hover Car decides to go. He will backtrack a few times, but it
shouldn't be a probem to follow him.
Keep following him and he'll take you straight to his Observatory at the top
of the mountain.
------------------------------------------------------------
Duff for Me, Duff for You
------------------------------------------------------------
- - - - - - -
Mission Start
- - - - - - - - - - - - - - - - - - - - - - - - - - - - - -
Talk to Professor Frink at the Observatory.
- - - - - - - - - -
Mission Walkthrough
- - - - - - - - - - - - - - - - - - - - - - - - - - - - - -
Oy glayvin, the plot is convoluting with the aliens and the evil soda and
oooh ay, the duff trucks!
Get in a fast vehicle and drive down the mountain to the Duff Brewery. When
you get there you'll run into your target, the Duff truck.
This is yet another old type of mission. You have to chase the truck and hit
it from the sides or head-on to make it drop a necessary item. Any turn is
good for getting hits, and a great spot to trap the truck is at the start of
the Squidport on the right side. The lower ramp that leads to the beach.
Try and get the 6 laser guns as quickly as possible because then you have to
drive back to the Duff Brewery.
When you get to the Duff Brewery drive through the glass covering an entrance
through the brewery. Grab the laser gun on top of a crate on the landing pad
to complete the mission.
------------------------------------------------------------
Full Metal Jackass
------------------------------------------------------------
- - - - - - -
Mission Start
- - - - - - - - - - - - - - - - - - - - - - - - - - - - - -
Talk to Principal Skinner at the Taffy Shop (near Krustylu Studios).
- - - - - - - - - -
Mission Walkthrough
- - - - - - - - - - - - - - - - - - - - - - - - - - - - - -
Let's talk to Principal Skinner for absolutely no reason! Apparently you
disobeyed school policy by carrying a laser gun outside of school, so he
confiscates it.
You guessed it, this is yet ANOTHER type of mission you've done dozens of
times already. I recommend getting a vehicle that has speed, acceleration,
and toughness ratings of 3. If you don't have something like that, the
Mr. Plow will do.
So chase Skinner and keep bashing into him. As always the turns are good for
crushing Skinner between you and a wall. Also try to make him crash into side
obstacles.
Once Skinner's car has been destroyed just grab the laser gun to end the
mission.
------------------------------------------------------------
Set to Kill
------------------------------------------------------------
- - - - - - -
Mission Start
- - - - - - - - - - - - - - - - - - - - - - - - - - - - - -
Talk to Krusty at Krustylu Studios.
- - - - - - - - - -
Mission Walkthrough
- - - - - - - - - - - - - - - - - - - - - - - - - - - - - -
So we need to buy yet another car. Talk to Kearney and he'll offer his Globex
Super Villain Car for 600 coins. If you need coins try searching in the
Krusty the Klown Show set and the Springfield News set.
Once you have the Globex Car the mission will begin.
This mission is a basic collect mission, but it's harder than the usual ones.
The first part involves driving from Krustylu Studios, through the Duff
Brewery, through the docks and Squidport, up the hill, through the shortcut
next to Barney's Bowl-A-Rama, and up to the gas station shortcut. Just hit
every stand along the way and do your best not to get a Hit & Run.
Here's a tip from Ben Yee:
On the hill after the Bowl-a-rama shortcut, *deliberately miss the booth in
the middle of the road*. Keep going up and you hit the gas station shortcut
with 4-6 seconds to go, then you jump down and take out the booth. Since the
"Return" timer doesn't start until the last booth is destroyed, this gives
you some extra time to finish the mission, which can be the difference
between succeeding and throwing your controller out the window.
Now you will have to drive back to Krustylu Studios in only 50 seconds. This
is the tough part. You will have to use every shortcut along the way, avoid
any cars, and DO NOT get any Hit & Runs. If you do get one, avoid the cops at
all costs.
Here are the key parts of the run:
-At the shortcut next to Aztec Theatre. You must go
through the shortcut without slowing down.
-Do not hit any cars or miss the ramp next to Burns'
Casino.
-Make sure to land smoothly at the Squidport and don't
crash into anything.
-Go through the small shortcut near the beginning of the
Squidport. It's between two buildings.
-DON'T GET A HIT & RUN!
Another tip, this one from Paul Partridge:
Take the skinny shortcut at the Squidport, then turn left and take the jump
from the ramp across into the bowels of the ship. Do this at full
speed and as soon as you hit the wall when you land in the ship, hit the
button that rights you (Z for Gamecube) and puts you back on the road (you
usually use it when you drive off a cliff). This puts you on the road on
the other side of the ship, with only a short run to go to the studios. This
saves you driving through the ship (which has a couple of sharp turns).
Talk to Krusty at the studios to complete the mission.
------------------------------------------------------------
Kang and Kodos Strike Back
------------------------------------------------------------
- - - - - - -
Mission Start
- - - - - - - - - - - - - - - - - - - - - - - - - - - - - -
Talk to Homer at the Krusty Burger by the Android's Dungeon.
- - - - - - - - - -
Mission Walkthrough
- - - - - - - - - - - - - - - - - - - - - - - - - - - - - -
The black sedan is trying to warn the aliens, or something! Homer's old high
school car may be able to beat it to the brewery.
Or not. This mission is VERY difficult. You can try and beat it the normal
way... Or you can take my super smart extra special shortcut.
When the race starts don't follow the sedan. Instead take the first left turn
and take the road that heads up over the mountain.
I'm not sure if this road to the brewery is shorter, but if you keep your
finger on the accelerator and don't crash too much it's guaranteed to work
(not a guarantee).
Drive into the Duff Brewery parking lot to end the mission.
------------------------------------------------------------
Milking the Pigs (Bonus)
------------------------------------------------------------
- - - - - - -
Mission Start
- - - - - - - - - - - - - - - - - - - - - - - - - - - - - -
Talk to Snake across the street from the gas station shortcut.
- - - - - - - - - -
Mission Walkthrough
- - - - - - - - - - - - - - - - - - - - - - - - - - - - - -
Snake has been in and out of jail how many times thus far? Anyway, he wants
to stay out this time, and he needs the evidence in Wiggum's car "taken care
of."
It's your basic damage mission. A tough and semi-speedy vehicle will come in
useful for crashing into Wiggum on the turns.
Collect the evidence after the police car has been destroyed and go back to
Snake.
Now that that is out if the way, Snake wants you to destroy a milk truck for
Fat Tony. Whatever... Do the same thing you did with Wiggum and then drive
back to Snake.
The reward for your destruction services will be Snake's Lil' Bandit. Dude,
sweet!
------------------------------------------------------------------------------
3G. Level 7: Nightmare on Evergreen Terror
------------------------------------------------------------------------------
------------------------------------------------------------
Rigor Motors
------------------------------------------------------------
- - - - - - -
Mission Start
- - - - - - - - - - - - - - - - - - - - - - - - - - - - - -
Talk to Lisa at the Simpsons' house.
- - - - - - - - - -
Mission Walkthrough
- - - - - - - - - - - - - - - - - - - - - - - - - - - - - -
Fine, let's go get some anti-zombie supplies if it'll shut her up.
This mission has some strict time limits, so I recommend using the fastest
car you have. Once you have the right one start the mission.
Jet over to Flanders' house and talk to him to get his first-aid kit. The
hell with his family.
From there drive up the street towards the cemetary. Don't go around the
long way. Instead, drive through the open cemetary and jump over the pond in
the middle. Floor it and keep going straight to pick up the boards at Cletus'
house.
Make a right turn and follow the road to get to Moe's house. He's a cool guy,
but come on. Who cares if he dies. Take his chainsaw and hop back in your
ride.
From here just head back to the Simpsons' house to complete the mission.
------------------------------------------------------------
Long Black Probes
------------------------------------------------------------
- - - - - - -
Mission Start
- - - - - - - - - - - - - - - - - - - - - - - - - - - - - -
Talk to Comic Book Guy at the school playground.
- - - - - - - - - -
Mission Walkthrough
- - - - - - - - - - - - - - - - - - - - - - - - - - - - - -
I wouldn't say they're the WORST effects ever, but you know Comic Book Guy.
Always complaining.
Anyway, we need a Zombie Car to beat the next mission for some reason. You
can buy it at the cemetary for 500 coins. If you need cash you should try the
Simpsons' backyard, the power plant, and the roofs around the Kwik-E-Mart.
Once you get the car, go to the school playground to begin the mission.
Normally a car this fast would be difficult to follow, but not when you're in
the Zombie Car. This vehicle is probably the best one so far.
So follow the black car. I'll tell you right now it's headed to the power
plant, so take any shortcuts you like. Just keep the green bar at the top
past halfway.
Also be careful not to crash into things too often because the Zombie Car is
pretty weak.
Drive into the power plant parking lot to end the mission.
------------------------------------------------------------
Pocket Protector
------------------------------------------------------------
- - - - - - -
Mission Start
- - - - - - - - - - - - - - - - - - - - - - - - - - - - - -
Talk to Professor Frink at the power plant.
- - - - - - - - - -
Mission Walkthrough
- - - - - - - - - - - - - - - - - - - - - - - - - - - - - -
Of course... nuclear waste! At least it isn't something stupid like water.
So get in Frink's Hover Car and pick up the nuclear waste barrel from inside
the power plant. The one thing about this mission that you have to watch for
is that any big hit will knock the barrel off your vehicle, and you will have
to go back for another barrel. So avoid all big crashes and definitely avoid
getting a Hit & Run.
Other than that, this is a basic race against the clock. Get to the school and
drive under the tractor beam to blow up the first barrel.
Oh gentle nerd, in death you have helped save them all.
------------------------------------------------------------
There's Something About Monty
------------------------------------------------------------
- - - - - - -
Mission Start
- - - - - - - - - - - - - - - - - - - - - - - - - - - - - -
Talk to Lisa at the school.
- - - - - - - - - -
Mission Walkthrough
- - - - - - - - - - - - - - - - - - - - - - - - - - - - - -
Oh, that wonderful Mr. Burns will save the day! Get in a fast vehicle to get
over there as soon as possible.
Drive along until you get to the Kwik-E-Mart, which is where the black alien
car will appear. Step on it and weave through a few trees if you can, and
make sure to use every shortcut. The black car doesn't have THAT much
tenacity because you can lose it fairly easily.
Um... what else? Oh yea, DON'T HIT STUFF! From now on any Hit & Run can cost
you the mission, so do your best to avoid the cops of the damned.
Pull into the power plant parking and get out of your vehicle. Notice the
arrows pointing up at the power plant? That's because Mr. Burns is inside his
office at the top of the building.
Use the broken and twisted rubble on the left and start jumping up. Run
through the cafeteria and out through the next hole to jump up the spaceship
(I guess all the cannons in the parking lot managed to bring 'er down). Jump
into the next hole in the wall to reach Mr. Burns' office and end the mission.
------------------------------------------------------------
Alien "Auto"topsy Part I
------------------------------------------------------------
- - - - - - -
Mission Start
- - - - - - - - - - - - - - - - - - - - - - - - - - - - - -
Talk to Mr. Burns at his office in the power plant.
- - - - - - - - - -
Mission Walkthrough
- - - - - - - - - - - - - - - - - - - - - - - - - - - - - -
Burns' office still has some security features, like the break-away floor.
The best way to run through it is to keep jumping and stay on the blue line
in the center.
Talk to Burns and get through the conversation (leafblower aliens...) and
he'll give you a map with the locations of the nuclear waste.
Now, make sure you have a fast car and pick up the nuclear waste inside the
power plant (we needed a map to find out it was right here?). Onward, to the
school!
Don't slow down too much, use all the shortcuts, and don't get a Hit & Run.
Same as the last mission. Drive into the light, my son, and the mission shall
end.
------------------------------------------------------------
Alien "Auto"topsy Part II
------------------------------------------------------------
- - - - - - -
Mission Start
- - - - - - - - - - - - - - - - - - - - - - - - - - - - - -
Talk to Snake near the school playground.
- - - - - - - - - -
Mission Walkthrough
- - - - - - - - - - - - - - - - - - - - - - - - - - - - - -
Oh how the tables have turned. This time Snake is the one getting
car-jacked.
Drive out of the school and make your way to the power plant (if you're not
familiar with the way to go at this point in the game, may god save your poor
soul).
Take all the usual shortcuts 'n stuff until you pass the Kwik-E-Mart, where
another black car will be on your tail. Drive fast (and rock hard) to get away
from the black car, much like the situation we were in a few missions ago.
When you go through the red cow barn slow down and make a right turn into the
pumpkin field. There is a repair wrench in a corner that you must get, now!
You don't want Snake's weak car to have any damage on it.
Drive through that dirt road behind the repair wrench to get to the power
plant. Back into the power plant and pick up the barrel, then step on it!
Meaning GO GO GO!!! You've done this part twice already, so you know what to
do.
Oh boy, we get to sacrifice Snake too! This is fun.
------------------------------------------------------------
Alien "Auto"topsy Part III
------------------------------------------------------------
- - - - - - -
Mission Start
- - - - - - - - - - - - - - - - - - - - - - - - - - - - - -
Talk to Grampa near the school playground.
- - - - - - - - - -
Mission Walkthrough
- - - - - - - - - - - - - - - - - - - - - - - - - - - - - -
Man, Grampa got one sweet upgrade for his old WWII Jeep. This speedy off-road
machine may be able to help stop the aliens once and for all!
Well, this it. The final (story) mission. And because this is the final story
mission, it is quite a bit tougher than any other mission so far. I will
actually point out every shortcut and strategy to beating this mission, simply
because it's so hard and I don't want people complaining.
Let's get the easy part out of the way. Drive out of the school and you'll be
confronted by another of those black alien cars that you have to beat to the
power plant. This race isn't tough if you use the proper shortcuts:
-Right after you pass Krusty Burger there is an alley on
the left side of the street. USE THIS SHORTCUT! It will
put you far ahead of the black car.
-When you get near the Simpsons' house (but on the other
side of the block), there is a shortcut on the right.
Use it to cut through a playground.
-The cemetary, trailer park, and cow barn are all small
shorcuts that can put even more distance between you and
the black car.
Now comes the tough part. Make sure you pick up the repair wrench next to the
pumpkin field, then drive into the power plant to pick up the waste barrel.
GOOOOO!!! Take off quickly and don't stop for anything. Of course you should
try and avoid hitting pedestrians or objects to avoid a Hit & Run, but don't
be so careful that it slows you down.
Here are the shortcuts you should use, in order:
-Cut through the field next to the red cow barn.
-Immediately after that field is the Springfield Tire Fire.
On this side of the fire is a large ramp that will make
you cut through without having to go around. Make sure
to jump off from the center of the ramp to avoid any
crashes.
-Cut through the trailer park, of course.
-The cemetary is another obvious one. To avoid a crash
in Grampa's rocket-powered car, look at the skid marks
on the ground and follow them to land right in the
center of the exit gate. You don't want to lose the
barrel at this point.
-Approach the shortcut at the blue house near the
Simpsons' house and slow down. The black car will
appear, but just avoid it and drive into the driveway.
Instead of going straight and crashing through the Buzz
Cola sign, make a left turn over the bushes and cut
through the playground. Drive out from the other side to
come out next to the Kwik-E-Mart.
-Drive down the street on the right side of the
Kwik-E-Mart and use the fire engine ladder ramp. Don't
veer to the right or left or you may lose the barrel in
a crash.
-Drive through the Krusty Burger parking lot and crash
through the Buzz Cola sign on the right.
-Use the small ramp on the left side of the school to get
inside the playground and drive into the tractor beam.
There is one key point in all this: the black car. You see, at that point you
probably have 10 to 12 seconds on the clock. Not nearly enough time to get to
the school.
But when the black car appears an evade timer comes out, which is another 30
seconds. Then when you cut through the playground and end up at the
Kwik-E-Mart, you save a whole bunch of time that would have been wasted going
around the block.
The black car and playground shortcut are what I'm trying to emphasize here.
If you handle that part well, you'll beat the mission without a hitch.
Well, Grampa's final moments on Earth were spent saving mankind from
destruction. But who takes the credit?
Watch the ending to find out.
But good job though, you beat the game! If you're a perfectionist like me,
you will now go back and get 100% in all the levels.
------------------------------------------------------------
Flaming Tires (Bonus)
------------------------------------------------------------
- - - - - - -
Mission Start
- - - - - - - - - - - - - - - - - - - - - - - - - - - - - -
Talk to Smithers in front of the Kwik-E-Mart.
- - - - - - - - - -
Mission Walkthrough
- - - - - - - - - - - - - - - - - - - - - - - - - - - - - -
Smithers needs your help in finding some items for Mr. Burns. Zombies or no
zombies.
I suggest you use a fast vehicle before starting the mission. You'll see why
later.
The first items are the sock garters. Quickly jump on the Duff truck and hop
on the steam vent to get pushed up and grab the garters. Jump back down and
talk to Smithers.
Now you need to get some tooth powder. Jump into the fast vehicle that
mysteriously appeared and drive straight into the fire engine at the end. Jump
out of your car and hop onto the ladder on the side of the fire engine, then
jump up to the Krusty Burger roof. Grab the tooth powder and get in that mini
race car. Hit the reverse button to drive off the roof, then drive back to
Smithers as quickly as possible.
Now Burns need a "Yes, We Have No Bananas" record (the record is some old
record from the 1920s). Get back in the mini racer and drive behind the
Kwik-E-Mart to get to Lard Lad's. Use the steam to get to the roof and then
to get the record from Lard Lad's shoulder. Get back to Smithers.
Sweet job, you just unlocked Mr. Burns' limo. Now you can ride in style.
==============================================================================
===== 4- STREET RACES ========================================================
------------------------------------------------------------------------------
4A. Overview
------------------------------------------------------------------------------
Hey, this wouldn't be much of a driving game if there were no races involved.
This game has 'em, and plenty to boot.
The purpose of street races is to unlock the fastest vehicle that can be
unlocked in each level. But, they are completely optional.
Since they're optional, I suggest you just skip them. I mean the first couple
of levels have easy races, but they get harder as you progress through the
game. If at any point it becomes too difficult, then skip the races and wait
to get a faster vehicle from a later level.
In each level there will be four types of races, and each type will always be
found with the same character.
- - - - - - - - -
Race 1: Milhouse
- - - - - - - - - - - - - - - - - - - - - - - - - - - - - -
Objective: Reach the finish line before time runs out.
This is a simple lap race by yourself, so it will always be the easiest race.
- - - - - - - -
Race 2: Nelson
- - - - - - - - - - - - - - - - - - - - - - - - - - - - - -
Objective: Complete all laps and finish the race in first place.
This is like Race 1, but with one or more other drivers.
- - - - - - -
Race 3: Ralph
- - - - - - - - - - - - - - - - - - - - - - - - - - - - - -
Objective: Pass all the checkpoints and reach the finish line first.
This race is from point A to point B. There are no laps, so all you have to do
is drive through the designated path to beat the other drivers.
- - - - - - - - -
Wager Race: Louie
- - - - - - - - - - - - - - - - - - - - - - - - - - - - - -
Objective: Bet money and win the race to get even more!
Wager races are in the game so you can have a means of getting more money. You
pay the entry fee, then there will be a certain time to beat. You have to race
through the entire level and if you win you get extra coins.
------------------------------------------------------------------------------
4B. Racing Strategies
------------------------------------------------------------------------------
These strategies apply to every type of race.
-As in any race, ALWAYS take the inner track at the turns.
This is important when trying to pass other racers.
-You do not have to pass through the blue checkpoints. As
long as you drive past them it will count.
-There may be two lanes in a race, but that does not mean
you have to stay in one lane. Drive through the lane that
will get you through the fastest.
-Actually, you don't have to stay in the lanes at all.
It will be easier to win if you cut through lawns,
parking lots, etc.
-Some races may have a point where you will fly out and
crash right into a wall. At these points it's best to
slow down before the jump and start to turn in the
direction of the turn ahead.
-Some races are not enclosed, so feel free to use any
shortcuts.
-Drive dirty. If you can cause another racer to crash and
get stuck, do it!
-Again, I recommend getting the Zombie Car or Open Wheel
Race Car from level 7. These will ensure victory in
any race.
------------------------------------------------------------------------------
4C. Race Locations
------------------------------------------------------------------------------
- - - -
Level 1
- - - - - - - - - - - - - - - - - - - - - - - - - - - - - -
Race 1: Talk to Milhouse in the hick area.
Race 2: Talk to Nelson at the gas station in the rich part of town.
Race 3: Talk to Ralph in front of the church.
Wager Race: Talk to Louie in front of the school.
- - - -
Level 2
- - - - - - - - - - - - - - - - - - - - - - - - - - - - - -
Race 1: Talk to Milhouse in the downtown area.
Race 2: Talk to Nelson near the Krusty Burger and construction building.
Race 3: Talk to Ralph on the street near Town Hall.
Wager Race: Talk to Louie in the bad part of town (near the car wash).
- - - -
Level 3
- - - - - - - - - - - - - - - - - - - - - - - - - - - - - -
Race 1: Talk to Milhouse at the docks, next to the C-Spanker.
Race 2: Talk to Nelson at the gas station next to the palm trees shortcut.
Race 3: Talk to Ralph on the street in front of the Duff Brewery.
Wager Race: Talk to Louie at Ye Olde Off-Ramp Inn.
- - - -
Level 4
- - - - - - - - - - - - - - - - - - - - - - - - - - - - - -
Race 1: Talk to Milhouse next to Burns' mansion.
Race 2: Talk to Nelson in front of Chester's gold house.
Race 3: Talk to Ralph right before passing the cemetary.
Wager Race: Talk to Louie in front of the school.
- - - -
Level 5
- - - - - - - - - - - - - - - - - - - - - - - - - - - - - -
Race 1: Talk to Milhouse across from the car wash near Moe's Tavern.
Race 2: Talk to Nelson near the fire engine ladder ramp in downtown.
Race 3: Talk to Ralph at the steps of the Springfield County Court House.
Wager Race: Talk to Louie near the Krusty Burger in downtown.
- - - -
Level 6
- - - - - - - - - - - - - - - - - - - - - - - - - - - - - -
Race 1: Talk to Milhouse across the road from the back of Burns' Casino.
Race 2: Talk to Nelson at the Aztec Theatre.
Race 3: Talk to Ralph at the Observatory.
Wager Race: Talk to Louie at Kamp Krusty.
- - - -
Level 7
- - - - - - - - - - - - - - - - - - - - - - - - - - - - - -
Race 1: Talk to the zombie with no brain across the street from the
Kwik-E-Mart.
Race 2: Talk to the female zombie in front of the remains of the church.
Race 3: Talk to the zombie in front of the school.
Wager Race: Talk to Louie at the power plant.
==============================================================================
===== 5- COLLECTOR CARDS =====================================================
Collector cards are like little moments in Simpsons history. Each card has a
reference to an episode that the particular character was a part of.
Once you collect all the cards, go to the Android's Dungeon in Level 3 and
look at the Itchy and Scratchy display. Comic Book Guy will then give you a
special ticket that you can use at the Aztec Theatre.
The collector cards also unlock tracks for the bonus multiplayer game. Each
level unlocks one track.
- - - -
Level 1
- - - - - - - - - - - - - - - - - - - - - - - - - - - - - -
#1 - Home Made Football: Behind the Simpsons' house. Jump on the light to
reach it.
#2 - Crab Juice: On the roof of the Kwik-E-Mart. Use the steam vent to
reach it.
#3 - Insanity Pepper: Stand in front of the Simpsons' house and face the
street. Now turn right and run all the way to the white house at the end.
You should see some coins that lead into the backyard, where you'll find
Ralph and the card.
#4 - Spinemelter 2000: In the rich part of town, right by Burns' mansion. Head
straight to the Stonecutters' tunnel, but make a left turn to the closed
street. Go into the alley and the card will be behind a garage on the right
side.
#5 - Parchment: Go through the Stonecutters' tunnel (you can go in through the
power plant or next to Burns' mansion). Jump on the coffin in the center room
and use the pillars to get up and reach the card in the center.
#6 - Carbon Rod: Go inside the power plant and run to the soda machine that
is directly across from Homer's workstation. Jump onto the steam vent across
from there, then high jump onto the next steam vent to get onto a platform
that will rise up. Ride the fan blades up here to reach the card in the
corner.
#7 - Mr. Sparkle Box: At the Royal King Trailer Park over in the hick part of
town. It's on top of one of the trailer homes.
- - - -
Level 2
- - - - - - - - - - - - - - - - - - - - - - - - - - - - - -
#1 - Head of Jebediah: In the town square. Jump on top of the statue to
reach it.
#2 - AM Radio Toy: Get a vehicle and park next to the building across from
the Screaming Monkey Research Center. Jump on top of the vehicle and get up
to the roof to find the card.
#3 - Bonestorm Game: Drive through the bad part of town and look for Louie
(dice on the radar). Use a vehicle to reach the fire escape near him and
climb to the roof to get the card.
#4 - "Big Butt Skinner": Drive up the street from Moe's Tavern and look for
a car wash. Go inside and jump on the suds machine to reach the card on the
high beam.
#5 - Mr. Honeybunny: Look for some stairs in the train area and climb up on
top of the train cars. Run across the moving car and jump to the last one to
get the card.
#6 - Drivers License: Drive around in downtown and look for a large Krusty
float. Look through the buildings and alleys near the float to find the card.
#7 - Pregnancy Test: Drive to Springfield Stadium and jump on top of the water
fountain. The spout at the top will push you up to the card.
- - - -
Level 3
- - - - - - - - - - - - - - - - - - - - - - - - - - - - - -
#1 - Angel Skeleton: Go into the alley behind the Android's Dungeon and jump
up to the roof of the shop.
#2 - Bart's Soul: Get onto the roof of the Bowl-A-Rama through the Krusty
Burger parking lot, then run out across the green support and do a high jump
to get the card.
#3 - Lisa Lionheart: Enter the lighthouse and use the elevator to get to the
top.
#4 - Lisa's Valentine: Jump onto the deck of the ship and head to the rear.
Climb the stairs and follow the walkway, then jump out onto the red edge of
the ship. Follow this path around to the other side to find the card.
#5 - Lisa's Machine: Go inside the Krusty The Klown set. Jump on the audience
bleachers and get up to the lighting beam, then use the fan to get to the
walkway on the other side. Jump into the hole to find the card.
#6 - Evil Braces: Look for a broken piece of railing at the Springfield Dam
and jump over it. The card is over the water spout just ahead.
#7 - Soy Pop: Drive to the bridge over Springfield Dam and make the jump so
that you land on the broken section in the middle. Look for the card on the
other side of the railing on the left (near the river).
- - - -
Level 4
- - - - - - - - - - - - - - - - - - - - - - - - - - - - - -
#1 - Mr. Plow Jacket: On the roof of the building next to the Kwik-E-Mart,
run to the end. Stand on the edge and jump to reach the card.
#2 - Burns Portrait: Second floor of Burns' mansion. Go in the library and
press the glowing statue in the back to alter the room. Grab the card from
above the fireplace.
#3 - Love Letter: On top of the brown steel bridge leading into the hick
area.
#4 - "Homer" Bowling Ball: On top of the building near the bridge to the rich
area. Use the steam vent and a high jump to reach.
#5 - Red Blazer: Go to the rich area and start accelerating as soon as you
jump the bridge. Go straight over the ramp above the gas station and then
hold B to stop on top of a brown building with the card.
#6 - Boudoir Album: Simpsons' backyard, in the treehouse.
#7 - Pepper Spray: Royal King Trailer park, on top of the trailer at the end.
- - - -
Level 5
- - - - - - - - - - - - - - - - - - - - - - - - - - - - - -
#1 - Apu's T-Shirt: Use the sand ramp near the construction building to get
inside the gap at the top. Jump on the beams on the others side and follow
them to get the card.
#2 - Pin Pals Shirt: Down the stairs of the mob hideout near Moe's Tavern.
#3 - Prop 24 Sign: Go around to the building with the fire escape near
Moe's Tavern climb about halfway up and jump on the ledge over the alley.
Follow the ledge to get to the roof of Moe's Tavern and the card.
#4 - Baby Feeder: Climb up the stairs in the train area and get on top of the
train on the other side of the water tower. Jump to the train on the right to
find the card.
#5 - Ganesh Costume: Get on the expressway at the end near downtown. Go into
the very first on-ramp on the right and stick to the left side so you can get
the card in mid air at the end.
#6 - Chutney Squishee: Get on the roof of the building near Krusty Burger by
using the steam vents. Jump on the billboard walkway to reach the card.
#7 - Hot Dog: Run up to the monorail platform and jump across the track to the
roof on the other side. Jump onto the other end of the track from there to get
the card.
- - - -
Level 6
- - - - - - - - - - - - - - - - - - - - - - - - - - - - - -
#1 - Radioactive Man #1: Look for one of the Itchy & Scratchy promo trucks
(with the green loud speakers on top). Drive it to the Wall E. Weasel's and
look for the card up in the air at the intersection. Park the truck
underneath and jump on the loud speakers to reach the card.
#2 - "Bort" License Plate: Use the ramp next to Burns' Casino to jump to the
Squidport, but make it a slow jump so you can grab the card in mid air.
#3 - Bart T-Shirt: Go to Planet Hype and jump on top of the sign. The card is
in the air on the side facing the ocean.
#4 - Australia Boot: Drive through the Squidport and past the right side of
the big ship. Stop at the end where the path turns left. Wait for a platform
to come down and jump on it. From there jump onto the ship's edge and run
around the front to the other side to find the card on one of the crates.
#5 - Itchy and Scratchy Cel: Drive through the Duff Brewery onto the Duff
blimp landing pad. Jump on the crates in the center and then jump onto the
blimp wing. Grab the card from there.
#6 - Gabbo Doll: Drive to Ye Olde Off-Ramp Inn and drive down the hill for a
few seconds. Right after you pass the telephone booth on the left you should
see a gap with some boulders and the card.
#7 - Bart's Flying Hamster Science Project: Start at the Android's Dungeon and
take the road toward the Observatory. When you get to the broken bridge over
the dam, stick to the very left side. If you were far enough left you should
easily grab the card in mid air over the gap.
- - - -
Level 7
- - - - - - - - - - - - - - - - - - - - - - - - - - - - - -
#1 - Soul Donut: Jump onto Flanders' shelter in the backyard to find the
card.
#2 - Krusty Doll: Go into the playground near the Simpsons' house and grab
the card from the top of the slide.
#3 - Human Cookbook: Drive to the school and enter the playground in the back
to find the card on top of the slide.
#4 - Time Travel Toaster: Jump on the roof of the Lard Lad's near the
Kwik-E-Mart by using the steam vent in the back. Jump on the steam vent on
the roof to reach the card on Lard Lad's shoulder.
#5 - Hell Toupee: Drive to the cemetary shortcut and jump down into the pond.
Jump along the floating coffins to get the card at the end.
#6 - Monkey's Paw: Get to the hick area and bust into the field by the red
cow barn. Jump up to the roof and get on the roof of silo to reach the card
on the other side.
#7 - "Smarch" Calendar: Go to the power plant and use the rubble in front to
climb up to another room. Go to the other side and keep climbing until you get
to Burns' office. The card is on the left side.
==============================================================================
===== 6- WASP CAMERAS ========================================================
Every level has exactly 20 wasp cameras. These things buzz around, and they
can even shoot you and cause you to lose a few coins. In the later levels
they will get a blue shield that gives them extra defense as well as become
more aggressive.
- - - -
Level 1
- - - - - - - - - - - - - - - - - - - - - - - - - - - - - -
#1: Flanders' backyard.
#2: Backyard of the Simpsons' other neighbor.
#3: Playground near the Simpsons' house.
#4: Backyard of Ralph's house (white house at the end of Simpsons' street).
#5: Top of the steel bridge going to the power plant.
#6: Top of the steel bridge going to the power plant.
#7: In the road of the Royal King Trailer Park (hick area).
#8: On a trailer at the Royal King Trailer Park (hick area).
#9: Dry field next to the red cow barn (hick area).
#10: Stonecutters' tunnel through the power plant. Use the ramp near the
coffin to destroy it.
#11: Stonecutters' tunnel through the power plant. Use the ramp near the
coffin to destroy it.
#12: Front of Chester's Gold House (near Burns' mansion).
#13: Top of the watch tower next to the broken bridge (the one that goes to
the rich area).
#14: On top of the school (use the steam vents to get up).
#15: On top of the school (the other side).
#16: Behind the school.
#17: On the bus in the school playground.
#18: On top of the gas station (next to Kwik-E-Mart).
#19: Roof of Lard Lad donuts.
#20: Kwik-E-Mart roof.
- - - -
Level 2
- - - - - - - - - - - - - - - - - - - - - - - - - - - - - -
#1: At the steps of Springfield County Court House.
#2: At the steps of Town Hall.
#3: At the other steps of Town Hall.
#4: Front lawn of the General Hospital.
#5: At the steps of the Natural History Museum.
#6: In front of an open patio near the museum.
#7: On the roof of a building near the Research Center. Use a vehicle to jump
up and get on the roof.
#8: Drive past the construction site and into the Lard Lad Donuts parking
lot. Use the vehicle to jump on roof.
#9: Roof of Moe's Tavern. Use the broken beam in the alley.
#10: Look for Louie (red dice on radar) and climb up the fire escape. The wasp
camera is on the roof.
#11: Same roof as #10.
#12: In front of the car wash near Moe's Tavern.
#13: Look for glass in the trains area and break it. Go inside to find the
wasp camera.
#14: In front of stairs in the train area.
#15: On top of first set of trains.
#16: Top of train on the other side of the water tower.
#17: In front of stairs that lead to the monorail.
#18: Monorail station platform.
#19: Roof on the other side of monorail.
#20: Krusty Burger parking lot (next to police station).
- - - -
Level 3
- - - - - - - - - - - - - - - - - - - - - - - - - - - - - -
#1: Roof of the building next to Android's Dungeon.
#2: Roof of Barney's Bowl-A-Rama. Use Krusty Burger lot.
#3: On the sandy beach south of Squidport.
#4: Roof of Planet Hype.
#5: In front of the lighthouse.
#6: In front of the rear steps of the ship.
#7: Next to a crane on the side of the ship.
#8: On the front end of the ship.
#9: Inside the Duff Brewery.
#10: The Duff blimp landing pad.
#11: The Duff blimp landing pad.
#12: Krusty the Klown TV set.
#13: Springfield News TV set.
#14: Right side of the road, before Ye Olde Off-Ramp Inn.
#15: Top floor of Ye Olde Off-Ramp Inn.
#16: Outside the Observatory.
#17: At Kamp Krusty.
#18: At Kamp Krusty.
#19: Over the broken railing at Springfield Dam.
#20: Through the elevator at Springfield Dam.
- - - -
Level 4
- - - - - - - - - - - - - - - - - - - - - - - - - - - - - -
#1: Simpsons' other neighbor.
#2: Simpsons' other neighbor.
#3: Flanders' backyard.
#4: To the right of the Simpsons' house at the end of the street. In Wiggum's
backayrd.
#5: To the right of the Simpsons' house at the end of the street. In Wiggum's
backayrd.
#6: Royal King Trailer Park.
#7: On top of a trailer at Royal King Trailer Park.
#8: In the field next to the red cow barn.
#9: In the power plant, right outside Homer's workstation.
#10: Inside Burns' mansion, on the staircase.
#11: Inside Burns' mansion, library.
#12: In Burns' backyard, on the chess board.
#13: In Burns' backyard, on the chess board.
#14: Tall building near the bridge to the rich area.
#15: Behind the school.
#16: Top of the school (use steam vents).
#17: Top of the school (other side).
#18: Gas station roof (next to Kwik-E-Mart).
#19: Gas pump island roof.
#20: Kwik-E-Mart roof.
- - - -
Level 5
- - - - - - - - - - - - - - - - - - - - - - - - - - - - - -
#1: At the steps of the Natural History Museum.
#2: In front of an open patio near the museum.
#3: At the steps of Town Hall.
#4: Front lawn of the General Hospital.
#5: Look for Louie (red dice on radar) and climb up the fire escape. The wasp
camera is on the roof.
#6: Same roof as #5.
#7: Roof of Moe's Tavern. Use the fire escape and the ledges about halfway up
to reach the roof.
#8: In front of stairs in the train area.
#9: On top of first set of trains.
#10: Top of train on the other side of the water tower.
#11: On top of the other train near the water tower.
#12: In front of stairs that lead to the monorail.
#13: On the monorail.
#14: Roof of the building next to monorail.
#15: Roof of the building next to monorail.
#16: Next to the purple Sit & Rotate Room tower.
#17: Next to the purple Sit & Rotate Room tower.
#18: At the steps of the police station.
#19: Roof of the building next to Krusty Burger. Use the steam vents.
#20: On a ledge in front of Springfield Stadium.
- - - -
Level 6
- - - - - - - - - - - - - - - - - - - - - - - - - - - - - -
#1: Roof of the building next to Android's Dungeon.
#2: Roof of another building next to Android's Dungeon.
#3: Green support at Barney's Bowl-A-Rama. Roof access.
#4: Roof of Planet Hype.
#5: In front of the lighthouse.
#6: In front of the rear steps of the ship.
#7: In front of the rear steps of the ship.
#8: Next to a crane on the side of the ship.
#9: Inside the Duff Brewery.
#10: The Duff blimp landing pad.
#11: Krusty the Klown TV set.
#12: Same as #11. Jump on the fans and over the wall.
#13: Springfield News TV set.
#14: Ye Olde Off-Ramp Inn.
#15: Outside the Observatory.
#16: Outside the Observatory.
#17: At Kamp Krusty.
#18: At Kamp Krusty.
#19: Over the broken railing at Springfield Dam.
#20: Through the elevator at Springfield Dam.
- - - -
Level 7
- - - - - - - - - - - - - - - - - - - - - - - - - - - - - -
#1: Fence between the Simpsons' house and Flanders' house.
#2: Simpsons' other neighbor.
#3: Flanders' backyard.
#4: Playground near the Simpsons' house.
#5: To the right of the Simpsons' house at the end of the street. In Wiggum's
backayrd.
#6: Top of the steel bridge going to the power plant.
#7: On top of a trailer at Royal King Trailer Park.
#8: On top of a trailer at Royal King Trailer Park.
#9: On the roof of the silo next to the red cow barn. Make the wasp shoot you
and fall down so it will follow.
#10: In the power plant parking lot.
#11: Burns' office. Climb the rubble to get there.
#12: Kwik-E-Mart roof.
#13: Gas station roof (next to Kwik-E-Mart).
#14: Lard Lad's roof (next to Kwik-E-Mart).
#15: Krusty Burger roof (use the wrecked vehicles).
#16: In the school playground.
#17: The baseball diamond at the school.
#18: School roof (use the steam vents).
#19: School roof (the other side).
#20: The blocked road next to the school.
==============================================================================
===== 7- GAGS ================================================================
Gags serve no real purpose. They're just there for a few laughs and for
references to the show (though the game already has tons of those). And a few
coins, but just one per gag.
- - - -
Level 1
- - - - - - - - - - - - - - - - - - - - - - - - - - - - - -
#1: The TV inside the Simpsons' house.
#2: Swings in the Simpsons' backyard.
#3: Grill in the Simpsons' backyard.
#4: Talky tiki in the Simpsons' backyard.
#5: Door of the bomb shelter in Flanders' backyard.
#6: Swings in the playground near the Simpsons' house.
#7: Radioactive gas tank in the power plant parking lot.
#8: The lever in Homer's workstation at the power plant.
#9: Fire extinguisher inside the school.
#10: Fire alarm inside the school.
#11: Frostillicus at the Kwik-E-Mart.
#12: Silent alarm behind Apu at the Kwik-E-Mart.
#13: ATM at the Kwik-E-Mart.
#14: Larry the Looter arcade at the Kwik-E-Mart.
#15: Squishee machine at the Kwik-E-Mart.
- - - -
Level 2
- - - - - - - - - - - - - - - - - - - - - - - - - - - - - -
#1: Catapult in town square.
#2: Cement mixing truck near construction building.
#3: Pickled egg jar in Moe's Tavern.
#4: Slot machine in Moe's Tavern.
#5: Love Tester in Moe's Tavern.
#6: Light up drinks in Moe's Tavern.
#7: Rat's milk machine, roof near Moe's Tavern (fire escape).
#8: Take a photograph of Hans Moleman at the DMV.
#9: Quarter car in Try-N-Save parking lot.
#10: Missile behind Herman's Military Antiques.
#11: Dumpster behind Krusty Burger (near police station).
- - - -
Level 3
- - - - - - - - - - - - - - - - - - - - - - - - - - - - - -
#1: Robot with the knife in the back of Android's Dungeon.
#2: Radioactive Man cardboard cut-out at Android's Dungeon.
#3: Yellow dumpster across the street from Krusty Burger.
#4: Ball drop at Wall E. Weasel's.
#5: Crane on top of the ship.
#6: Alarm at the Observatory.
#7: Perpetual motion machine on the desk at the Observatory.
#8: Telescope at the Observatory.
#9: Monkey in the matter transporter at the Observatory.
#10: Flag at Kamp Krusty.
#11: Boar's head at Kamp Krusty.
- - - -
Level 4
- - - - - - - - - - - - - - - - - - - - - - - - - - - - - -
#1: The TV inside the Simpsons' house.
#2: Swings in the Simpsons' backyard.
#3: Grill in the Simpsons' backyard.
#4: Talky tiki in the Simpsons' backyard.
#5: Krusty table lamp in Bart's room (backyard window).
#6: Door of the bomb shelter in Flanders' backyard.
#7: Radioactive gas tank in the power plant parking lot.
#8: The lever in Homer's workstation at the power plant.
#9: Fire extinguisher inside the school.
#10: Fire alarm inside the school.
#11: Frostillicus at the Kwik-E-Mart.
#12: Silent alarm behind Apu at the Kwik-E-Mart.
#13: ATM at the Kwik-E-Mart.
#14: Larry the Looter arcade at the Kwik-E-Mart.
#15: Squishee machine at the Kwik-E-Mart.
- - - -
Level 5
- - - - - - - - - - - - - - - - - - - - - - - - - - - - - -
#1: Pickled egg jar in Moe's Tavern.
#2: Slot machine in Moe's Tavern.
#3: Love Tester in Moe's Tavern.
#4: Light up drinks in Moe's Tavern.
#5: Take a photograph of Hans Moleman at the DMV.
#6: Dumpster behind Krusty Burger (near police station).
- - - -
Level 6
- - - - - - - - - - - - - - - - - - - - - - - - - - - - - -
#1: Robot with the knife in the back of Android's Dungeon.
#2: Radioactive Man cardboard cut-out at Android's Dungeon.
#3: Yellow dumpster across the street from Krusty Burger.
#4: Ball drop at Wall E. Weasel's.
#5: Crane on top of the ship.
#6: Alarm at the Observatory.
#7: Perpetual motion machine on the desk at the Observatory.
#8: Telescope at the Observatory.
#9: Monkey in the matter transporter at the Observatory.
#10: Flag at Kamp Krusty.
#11: Boar's head at Kamp Krusty.
- - - -
Level 7
- - - - - - - - - - - - - - - - - - - - - - - - - - - - - -
#1: The TV inside the Simpsons' house.
#2: Swings in the Simpsons' backyard.
#3: Talky tiki in the Simpsons' backyard.
#4: Krusty table lamp in Bart's room.
#5: Clown bed in Bart's room.
#6: Door of the bomb shelter in Flanders' backyard.
#7: Swings in the playground near the Simpsons' house.
#8: Radioactive gas tank in the power plant parking lot.
#9: Frostillicus at the Kwik-E-Mart.
#10: Silent alarm behind Apu at the Kwik-E-Mart.
#11: ATM at the Kwik-E-Mart.
#12: Larry the Looter arcade at the Kwik-E-Mart.
#13: Squishee machine at the Kwik-E-Mart.
#14: Fire extinguisher inside the school.
#15: Fire alarm inside the school.
==============================================================================
===== 8- OTHER STUFF =========================================================
------------------------------------------------------------------------------
8A. Character Vehicles
------------------------------------------------------------------------------
- - - -
Level 1
- - - - - - - - - - - - - - - - - - - - - - - - - - - - - -
Family Sedan: Homer's default vehicle.
Plow King: Purchase from Barney at gas station for 150 coins.
Pickup Truck: Complete "This Old Shanty" bonus mission.
Duff Truck: Purchase from Gil in the hick area for 125 coins.
Surveillance Van: Buy from Gil in the hick area for 100 coins.
Electaurus: Complete all three street races.
- - - -
Level 2
- - - - - - - - - - - - - - - - - - - - - - - - - - - - - -
Honor Roller: Bart's default vehicle.
Mr. Plow: Purchase from Homer at the hospital for 200 coins.
WWII Vehicle: Complete "Dial B for Blood" bonus mission.
Limo: Purchase from Gil in downtown for 150 coins.
Fire Truck: Purchase from Gil in downtown for 250 coins.
Moe's Sedan: Complete all three street races.
- - - -
Level 3
- - - - - - - - - - - - - - - - - - - - - - - - - - - - - -
Malibu Stacy Car: Lisa's default vehicle.
School Bus: Purchase from Otto at Kamp Krusty for 300 coins.
Skinner's Sedan: Complete the "Princi-Pal" bonus mission.
Donut Truck: Purchase from Gil at the docks for 250 coins.
Nerd Car: Purchase from Gil at the docks for 250 coins.
Book Burning Van: Complete all three street races.
- - - -
Level 4
- - - - - - - - - - - - - - - - - - - - - - - - - - - - - -
Canyonero: Marge's default vehicle.
Kremlin: Complete "Beached Love" bonus mission.
Curator: Purchase from Gil in the hick area for 300 coins.
Krusty's Limo: Buy from Gil in the hick area for 350 coins.
Tractor: Buy from Willy at the school for 400 coins.
Clown Car: Complete all three street races.
- - - -
Level 5
- - - - - - - - - - - - - - - - - - - - - - - - - - - - - -
Longhorn: Apu's default vehicle.
The Homer: Purchase from Homer at the hospital for 500 coins.
Hover Car: Complete the "Kinky Frinky" bonus mission.
Cola Truck: Purchase from Gil in downtown for 350 coins.
Police Car: Purchase from Gil in downtown for 425 coins.
El Carro Loco: Complete all three street races.
- - - -
Level 6
- - - - - - - - - - - - - - - - - - - - - - - - - - - - - -
Ferrini: Bart's default vehicle.
Globex Car: Buy from Kearney at Krustylu Studios for 600.
Bandit: Beat the "Milking the Pigs" bonus mission.
Armored Truck: Buy from Gil at the docks for 400 coins.
Chase Sedan: Buy from Gil at the docks for 500 coins.
36 Stutz Bearcat: Complete all three street races.
- - - -
Level 7
- - - - - - - - - - - - - - - - - - - - - - - - - - - - - -
70's Sports Car: Homer's default vehicle.
Zombie Car: Purchase from zombie at cemetary for 500 coins.
Mr. Burns' Limo: Beat the "Flaming Tires" bonus mission.
Hearse: Buy from Gil across Lard Lad's for 750 coins.
Hover Bike: Buy from Gil across Lard Lad's for 1000 coins.
Open Wheel Race Car: Complete all three street races.
------------------------------------------------------------------------------
8B. Other Vehicles
------------------------------------------------------------------------------
Each level has a special vehicle that cannot be accessed through a phone
booth. These vehicles will always appear in a certain place and are sometimes
very useful.
You can also choose ANY vehicle in the game by using the ABAB code and
pressing L or R at the telephone menu. Please check section 10- Code and
Secrets for details.
- - - -
Level 1
- - - - - - - - - - - - - - - - - - - - - - - - - - - - - -
Rocket Car: The rocket car is parked in front of Chester's gold house in the
rich part of town. Chester J. Lampwick bought the car after getting a
settlement from Itchy & Scratchy Inc. for the the creation of Itchy.
- - - -
Level 2
- - - - - - - - - - - - - - - - - - - - - - - - - - - - - -
Monorail: Go into the downtown area and climb up to the monorail platform.
Jump onto the track on the left to get inside the lead monorail car. It is
all that's left of the ill-fated monorail, sold to them by sheister Lyle
Lanley.
- - - -
Level 3
- - - - - - - - - - - - - - - - - - - - - - - - - - - - - -
Knight Boat: Get on board the C-Spanker and climb up on top of the green
crates near the rear of the ship. Knight Boat, the crime-solving boat, is
inside the big green crate at the top.
- - - -
Level 4
- - - - - - - - - - - - - - - - - - - - - - - - - - - - - -
Quad Bike: Go to the Royal King Trailer Park and drive to the end of it. Look
between some mobile homes on the right to find the blue quad motorcycle.
- - - -
Level 5
- - - - - - - - - - - - - - - - - - - - - - - - - - - - - -
Obliteratron Truck: Drive to the entrance of Springfield Stadium and you
should see the truck sitting on a platform to the left.
- - - -
Level 6
- - - - - - - - - - - - - - - - - - - - - - - - - - - - - -
Pink Cadillac: Drive to the Squidport and get on the roof of Planet Hype. If
you run around to the front of the building and use the C stick to move the
camera, you can see Hans Moleman's pink Cadillac stuck in the building. Jump
down onto it to drive it.
- - - -
Level 7
- - - - - - - - - - - - - - - - - - - - - - - - - - - - - -
Mini Racer: Drive to the Kwik-E-Mart and pull into the street with the wrecked
vehicles. Get out and jump on top of the fire engine, then on top of Krusty
Burger to find the mini racer.
------------------------------------------------------------------------------
8C. Character Clothing
------------------------------------------------------------------------------
- - - -
Level 1
- - - - - - - - - - - - - - - - - - - - - - - - - - - - - -
Casual: Purchase at the Kwik-E-Mart or school for 100 coins.
Muumuu: Purchase at the Kwik-E-Mart or school for 125 coins.
Chosen One: Buy at the Kwik-E-Mart or school for 150 coins.
- - - -
Level 2
- - - - - - - - - - - - - - - - - - - - - - - - - - - - - -
Tall: Buy at the DMV or at Moe's Tavern for 150 coins.
Football: Buy at the DMV or at Moe's Tavern for 200 coins.
Ninja: Buy at the DMV or at Moe's Tavern for 250 coins.
- - - -
Level 3
- - - - - - - - - - - - - - - - - - - - - - - - - - - - - -
Cool: Buy at Android's Dungeon or Observatory for 250 coins.
Floreda: At Android's Dungeon or Observatory for 250 coins.
Hockey: At Android's Dungeon or Observatory for 300 coins.
- - - -
Level 4
- - - - - - - - - - - - - - - - - - - - - - - - - - - - - -
Inmate: Buy at Kwik-E-Mart, Bart's room, or school for 300.
Classy: Buy at Kwik-E-Mart, Bart's room, or school for 350.
Police: Buy at Kwik-E-Mart, Bart's room, or school for 400.
- - - -
Level 5
- - - - - - - - - - - - - - - - - - - - - - - - - - - - - -
Army: Purchase at Moe's Tavern or the DMV for 375 coins.
American: Purchase at Moe's Tavern or the DMV for 425 coins.
B-Sharps: Purchase at Moe's Tavern or the DMV for 475 coins.
- - - -
Level 6
- - - - - - - - - - - - - - - - - - - - - - - - - - - - - -
Hugo: Buy at the Observatory or Android's Dungeon for 400.
Cadet: Buy at the Observatory or Android's Dungeon for 500.
Bartman: Buy at Observatory or Android's Dungeon for 600.
- - - -
Level 7
- - - - - - - - - - - - - - - - - - - - - - - - - - - - - -
Dirty: Buy at Kwik-E-Mart or school for 400 coins.
Evil: Buy at Kwik-E-Mart or school for 450 coins.
Donut: Buy at Kwik-E-Mart or school for 500 coins.
------------------------------------------------------------------------------
8D. Bonus Game
------------------------------------------------------------------------------
If you gather all the collector cards in each level, you will unlock tracks
for a bonus multiplayer game.
Up to four players can play, and there are multiple options at the menu
screen:
Tracks: Choose from any of the seven tracks (when you have
unlocked them).
Laps: Select from one to five laps per race.
Character: You can choose to play as Homer, Lisa, Bart,
Marge, or Apu.
Vehicle: And finally, you can select any of the vehicles
that you have unlocked in the game.
If you choose to play alone, use the more camera angles code (found in the
codes section below) and you can switch to a front view. Makes it more fun.
------------------------------------------------------------------------------
8E. Coin Collecting
------------------------------------------------------------------------------
I know collecting coins can be a pain in the arse (near the end it's
definitely a problem), so I figured I'd add a few tips (from both myself and
readers).
-Try to collect all the coins your first time through a
level. It will elminate the need to go back later on.
-Don't buy the optional stuff. In some levels you will
have to buy one car and one new costume, at the MOST.
Anything beyond that would be a waste really, and like
I said it's mandatory to have lots of coins in the
later levels.
-Wager races, baby! Bet to your heart's content and you
could win big.
-BuRRe sent me this tip. It's very possible to collect
coins by simply destroying stuff (vehicles, lamp posts,
mailboxes, etc.), but your wanted meter will shoot up
quicker than a junkie at a California rave.
What you can do to avoid the wanted meter madness is
stay near one of the people that start a wager race.
When the wanted meter starts flashing, get out of your
vehicle and talk to the race person. From there you
can just cancel the race and the wanted meter will be
empty. Not bad at all, really.
-You can also lose your wanted meter by getting out of
your vehicle and getting back in. That only works with
character vehicles, so if you're in a generic street
vehicle you will have to switch to a different one.
-When smashing things to get coins, play in the first
level. Not only is there plenty to destroy, but your
Hit & Run meter goes down much faster than in later
levels, helping you avoid those nasty fines.
-Don't hit pedestrians. I know it's fun, but if you're
going to increase your Hit & Run meter you'll be better
off hitting things that are going to give you coins.
-While most objects only yield one coin when you hit
them, Phone Booths and Krusty Glass give up two and five
coins respectively, so smash these things whenever you
can. The Krusty Glass won't even increase your Hit & Run
meter when you break it, which is a nice bonus. Also,
blowing up a traffic vehicle nets you ten coins at the
price of a major Hit & Run meter jump.
-Destroying stuff will give you money, but some objects
more than others. Phone booths yield 2 coins, Krusty
glass panels are 5 coins, and other cars are 10 coins.
-Switch to a heavy vehicle and it shouldn't take more
than 3 or 4 hits to blow up a car. Cars will suffer
*major* damage if you smash them into walls, railings
etc. (useful in all Damage-type missions). Destroying a
car will usually raise your wanted-meter by almost half.
==============================================================================
===== 9- CODES AND SECRETS ===================================================
Here are the known secrets:
- - - - - - - - - - - - - - - - - - - - - - - - - - - - - -
"500 Yard Gash" Cartoon: Collect all 49 of the collector cards and you can get
a ticket from Comic Book Guy in level 3. Take that ticket to the Aztec Theatre
to watch an Itchy and Scratchy cartoon made for this game.
Holiday Themes: If your Gamecube is set to October 31st, November 27th, or
December 25th you can see a special holiday theme at the main menu.
Here are the currently known codes (from GameFAQs.com):
- - - - - - - - - - - - - - - - - - - - - - - - - - - - - -
Hold L and R at the Options menu and press these codes:
BBYX: Secret cars
YYXX: One-hit explosions
YYYY: Speedier cars
XXXX: Speedier cars
BABY: Grid
YAYA: Never take damage
BBBA: Different camera angles (including Bonus Game)
XXXY: Press Z to jump
YYBX: Speedometer
BBYX: Change car into a toy car
ABAB: Unlock all vehicles (after having 100%).
Then press L or R at the telephone menu to choose
any vehicle.
==============================================================================
===== 10- GUIDE INFORMATION ==================================================
------------------------------------------------------------------------------
10A. Version History
------------------------------------------------------------------------------
Version 1.7: July 11th
- - - - - - - - - - - -
More tips and corrections from readers.
Version 1.6: April 5th
- - - - - - - - - - - -
Added information from some hobo guy... :)
Version 1.5: January 7, 2004
- - - - - - - - - - - - - - -
More minor updates, including a correction about the "Yes, We Have No Bananas"
record in the level 7 bonus mission, and a tip from Ben Yee.
Version 1.4: December 11, 2003
- - - - - - - - - - - - - - - -
You guessed it. I got more tips from readers and threw them into the guide.
Version 1.3: December 5, 2003
- - - - - - - - - - - - - - -
More minor stuff, including helpful tips from hkblur and William Connors.
Version 1.2: November 26, 2003
- - - - - - - - - - - - - - - -
Just added some contributions from people have emailed me. Thanks to them for
helping with anything I might've missed.
Version 1.1: October 6, 2003
- - - - - - - - - - - - - - -
Matthew Conrad threw some info in my direction about the record in the
"Flaming Tires" bonus mission.
Version 1.0: October 6, 2003
- - - - - - - - - - - - - - -
Added the aforementioned sections AND did a spellcheck.
Version 0.8: October 1, 2003
- - - - - - - - - - - - - - -
Sweetness, I finally finished up this guide. Well, almost finished. I still
have to complete the Other Vehicles section and Street Races section. Expect
them in a few days.
------------------------------------------------------------------------------
10B. Guide Credits
------------------------------------------------------------------------------
Thanks to...
1. Big, huge thanks to the guys who contributed codes at GameFAQs.com.
2. Matthew Conrad gets a big thanks for telling me where the "Yes, We Have No
Bananas" record came from. Then, Michael J. Barry gets thanks for his
correction.
3. BuRRe, hkblur, William Connors, and Ville for sending me some more
efficient ways to collect coins and avoid cops.
4. Arjun Ratnayake, Ben Yee, Hobo Joe, Paul Partridge, and John Hamill for
their tips and corrections.
5. Matt Groening. The man created 'The Simpsons' and 'Futurama', two hilarious
shows that can't be topped. Shine on you crazy bearded bastard!
6. If I thank Matt Groening, then I also have to praise the hundreds of
individuals who are involved with the shows. To the writers, voice actors,
animators, producers, gofers, and every other person involved... thank you!
7. Wilson Lau gets mad props for his kick ass 'Bart vs. the Space Mutants'
guide. It inspired me to write guides for video games.
8. Fox Interactive, Vivendi Universal, and Radical Entertainment for making
the game.
9. Thank YOU for reading. After all, I didn't write this for my own health...
------------------------------------------------------------------------------
10C. Contact Information
------------------------------------------------------------------------------
So, the address is: subsane@gmail.com
The issue of too many e-mails isn't a problem, so I'll most likely respond to
any questions (for now). But, I do delete e-mails without a subject. Put
something like 'Hit & Run FAQ' to be sure I read it.
------------------------------------------------------------------------------
10D. Legal Stuff
------------------------------------------------------------------------------
1. "The Simpsons Hit & Run" is copyright © 2003 Fox Interactive and Vivendi
Universal. The Simpsons and any related Simpsons characters are property of
Twentieth Century Fox Film Corporation.
2. This guide copyright © 2003-2004 SubSane. This guide may be distributed
freely as long as it remains in it's ORIGINAL and UNALTERED form. It is only
for private use and may not be reproduced for commercial purposes.
If I discover that this guide has been altered in any way and is being
displayed publicly, I reserve the right to have the guide removed from that
location.